|
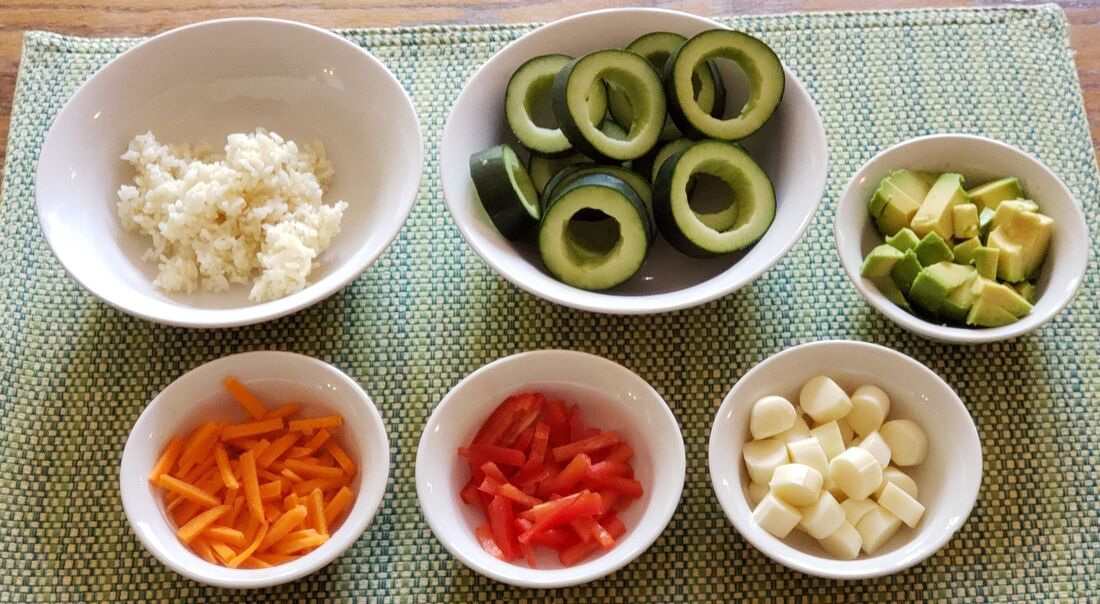
These kid-friendly sushi rolls are a healthy lunch option. Have your kiddos help assemble the Cucumber Sushi and get creative with the filling!
"Learn to Love Veggies" Tip
Get your kids in the kitchen! To make the assembly super simple for children, first fill small bowls or ramekins with each filling (i.e. cubed avocado, sliced string cheese, cooked rice, bell pepper strips, etc.). Encourage them to snack as they assemble their Cucumber Sushi!
 Cucumber Sushi
Yield: 4-6
Prep time: 5 MinCook time: 10 MinTotal time: 15 Min
These kid-friendly sushi rolls are a healthy lunch option. Have your kiddos help assemble the Cucumber Sushi and get creative with the filling!
Ingredients
Instructions
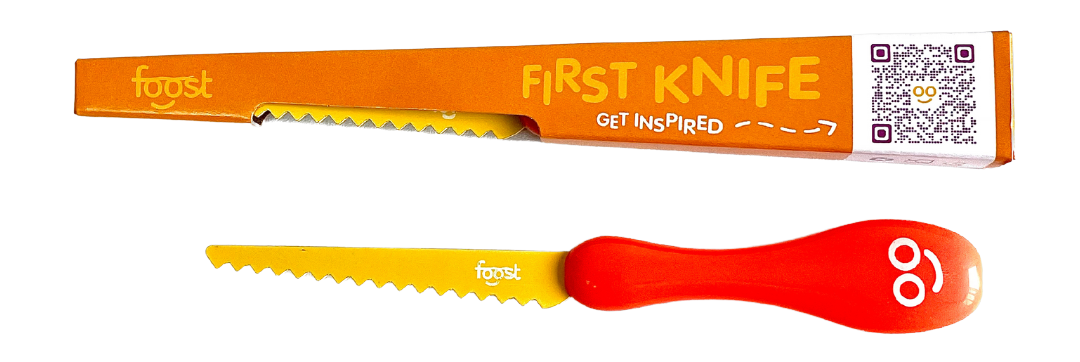
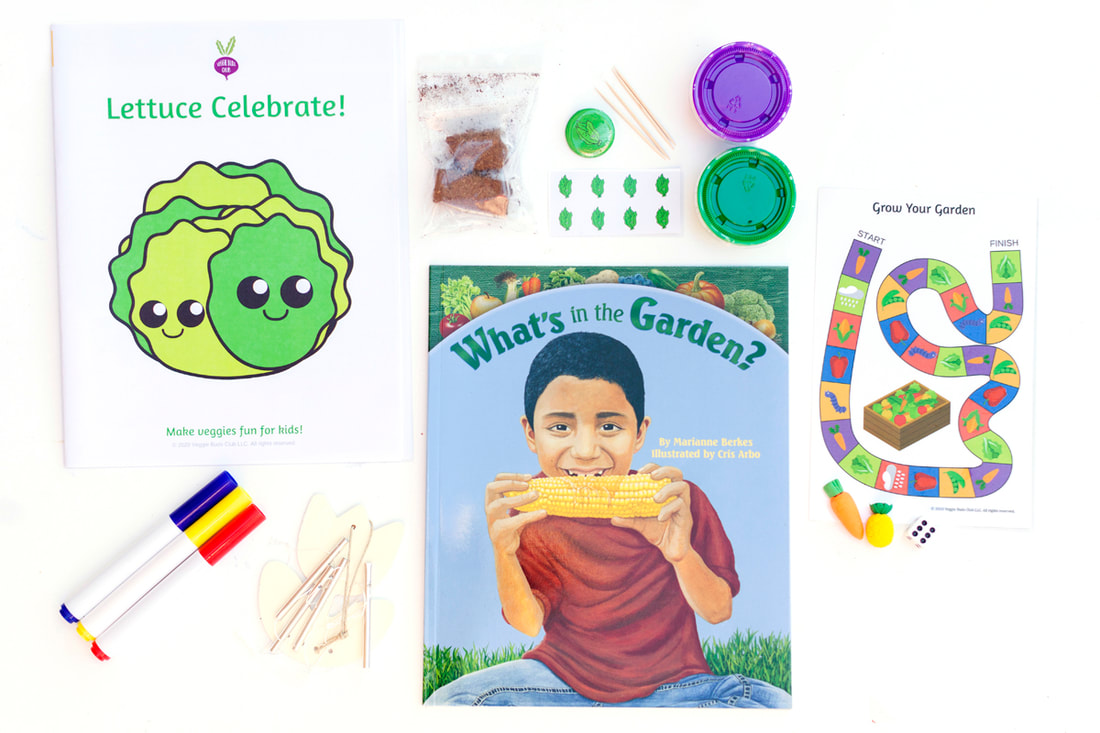
Check out our shop for products that teach kids to learn to love veggies! This includes veggie activity boxes, kid-safe knives, interactive placemats, and more.
0 Comments
This rice dish that tastes just like pizza, a kid favorite! Your child can help chop the tomatoes and mash and stir them over the stove (if you're comfortable with this step). Finally, they can top the tomato-rice mixture with shredded cheese and then enjoy the final tasty dish!
"Learn to Love Veggies" Tip
Here is a great opportunity to talk with your child about all of the great condiments that tomatoes can be found in such as ketchup, pasta sauce, and pizza sauce! Having them help out with this recipe will make it so that they are more likely to try it and not be alarmed that tomatoes, a.k.a the "pizza sauce veggie", are in this dish.
 Pizza Rice
Yield: 4-6
This rice dish that tastes just like pizza, a kid favorite!
Ingredients
Instructions
Check out our shop for products that teach kids to learn to love veggies! This includes veggie activity boxes, kid-safe knives, interactive placemats, and more!
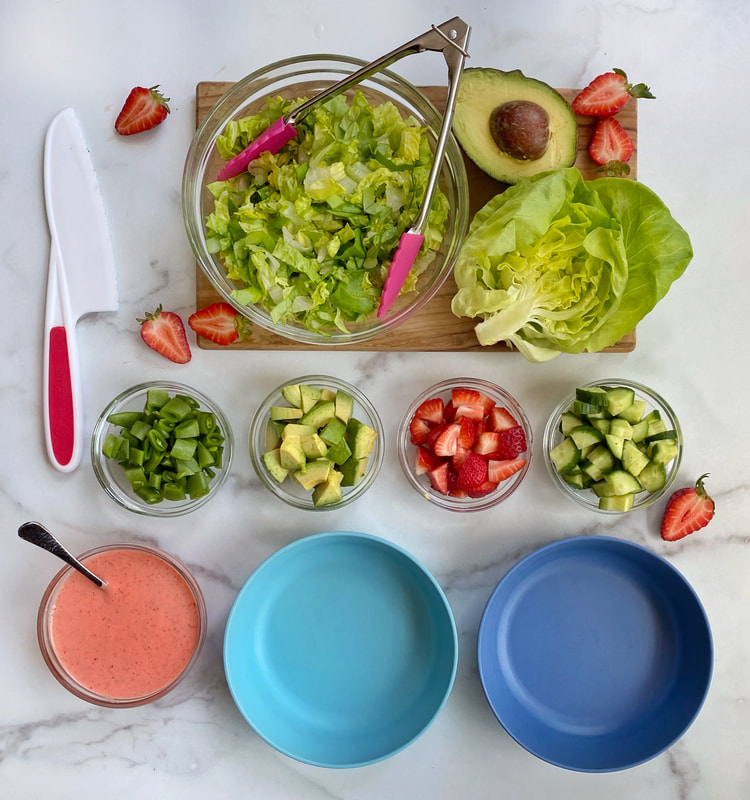
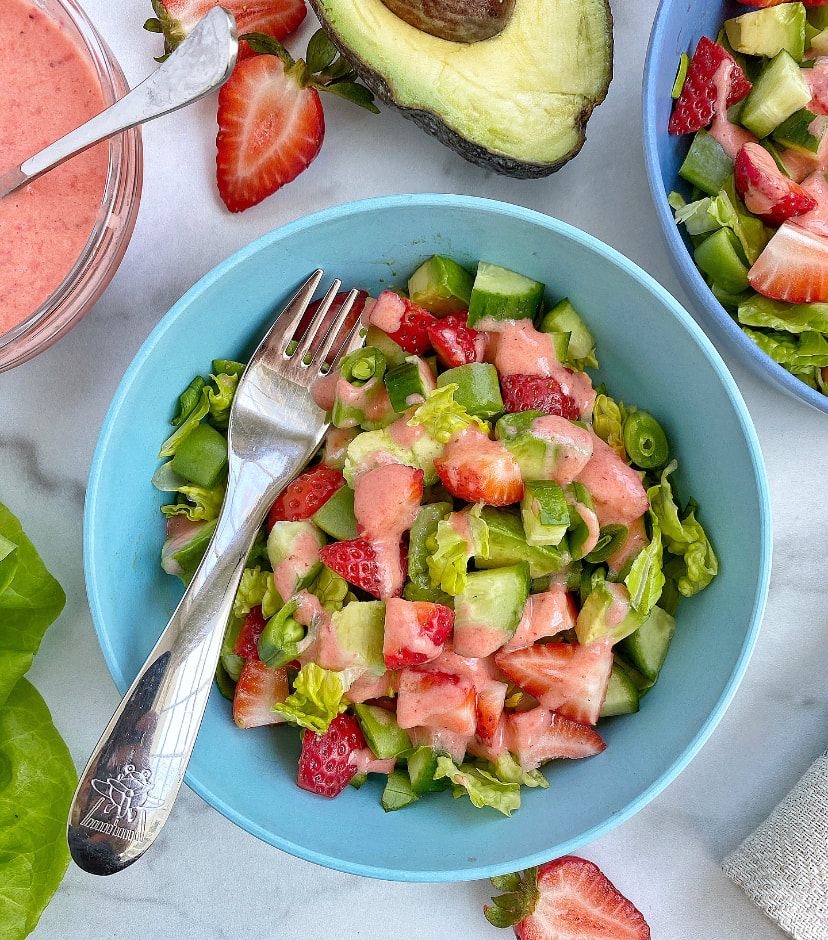
For this easy, colorful salad, you can really use whatever fresh veggies your family enjoys. Mix up the types of lettuce you use and try out different toppings as well. I really love to make this salad a more complete meal by adding some crumbled feta or goat cheese and some sliced almonds. You can also add some cooked chicken or shrimp too. The dressing is so simple and sweet. Plus, the pink color makes it extra fun for kids!
This recipe was developed by Happy Kids Kitchen for Veggie Buds Club. "Learn to Love Veggies" Tips
Salad can be tricky for most kids to enjoy. For one, we don’t often serve kids salad and two, lots of greens can have a slightly bitter taste. Here are some things I’ve found that help kids eat and enjoy salad greens:
 Chopped Salad with Sweet Strawberry Dressing
For this easy, colorful salad, you can really use whatever fresh veggies your family enjoys. Mix up the types of lettuce you use and try out different toppings as well. I really love to make this salad a more complete meal by adding some crumbled feta or goat cheese and some sliced almonds. The dressing is so simple and sweet. Plus, the pink color makes it extra fun for kids!
Ingredients
Salad
Dressing
Instructions
Check out our shop for products that teach kids to learn to love veggies! This includes veggie activity boxes, kid-safe knives, interactive placemats, and more!
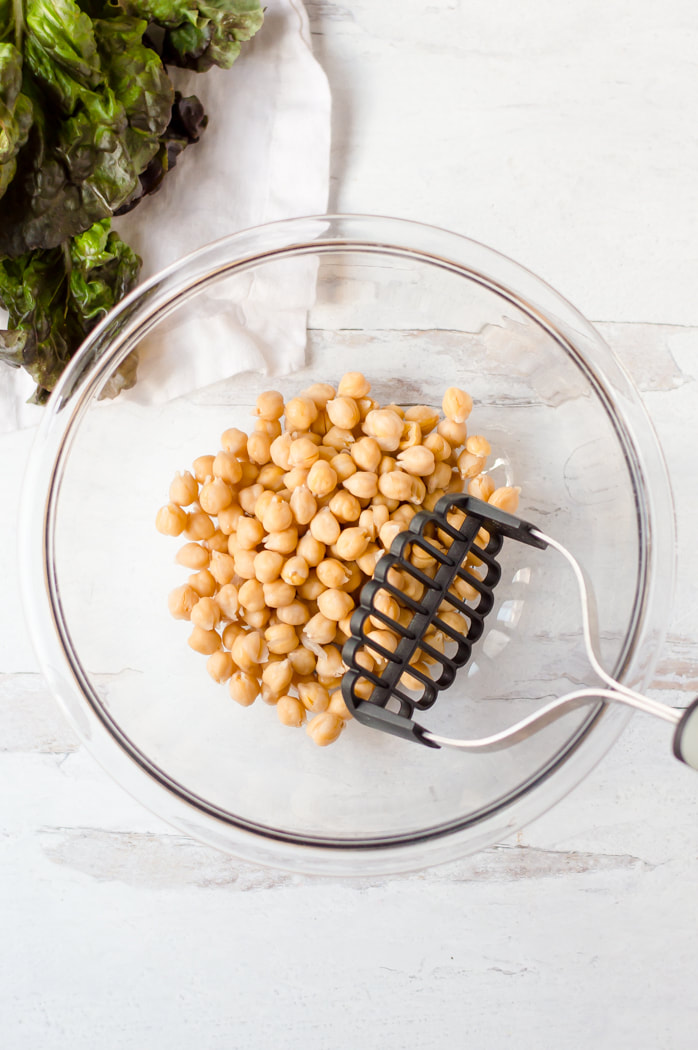
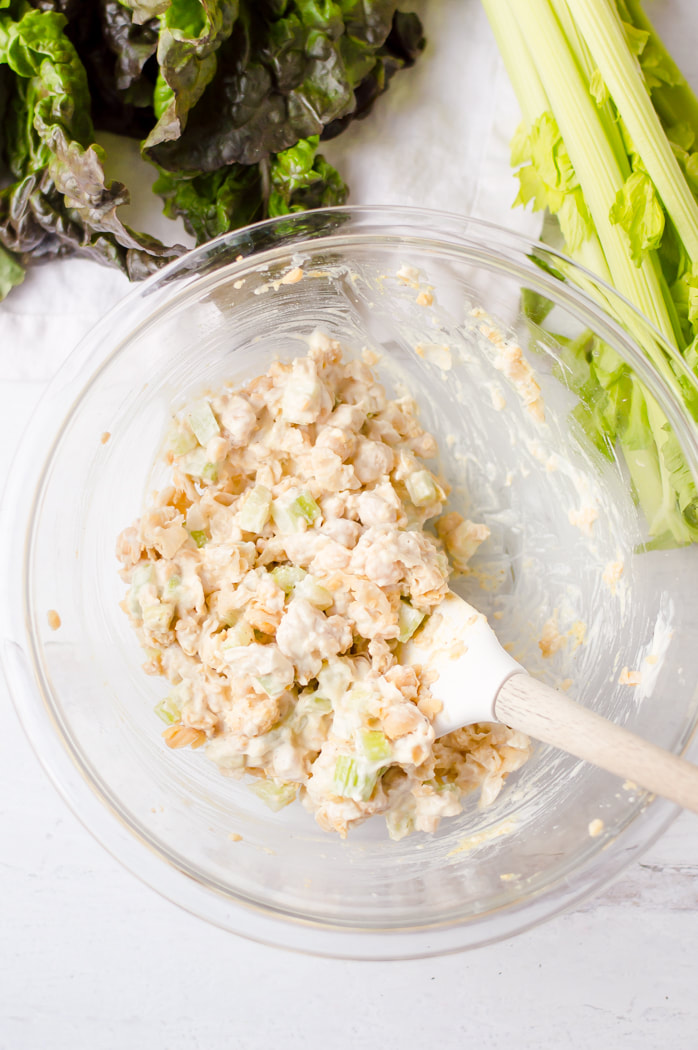
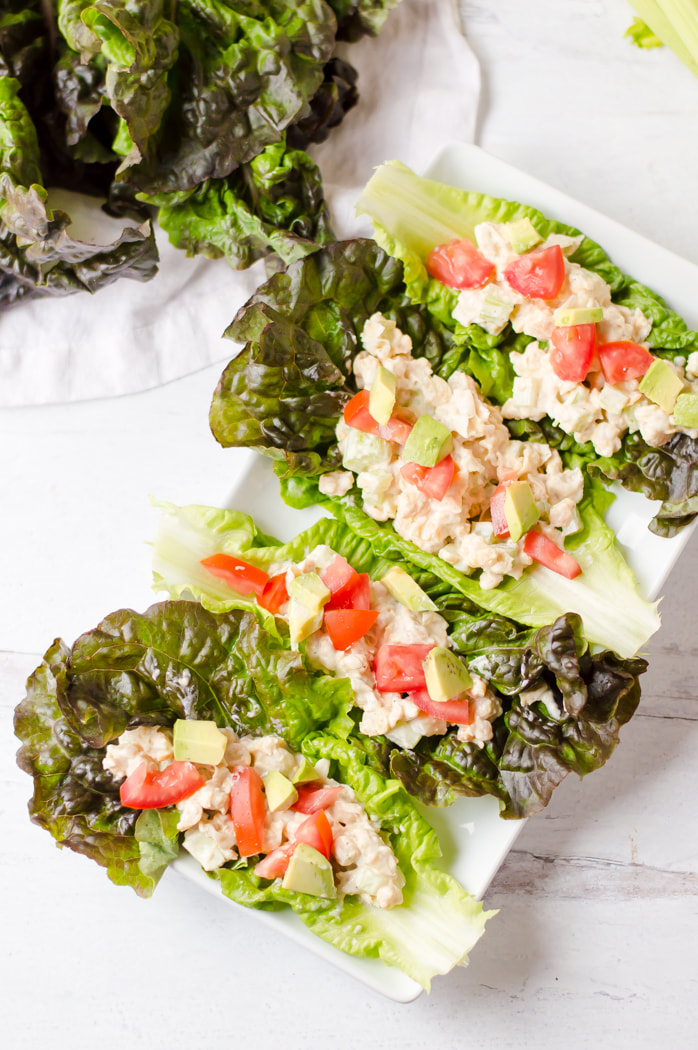
This mashed chickpea salad is a vegetarian version of the classic tuna salad and is a perfect no-cook meal that you can easily make in minutes.
We are excited to bring you this creative and tasty kid-approved recipe from Taesha at The Natural Nurturer! "Learn to Love Veggies" Tip
Have your child scoop the Chickpea Salad onto lettuce "boats" all by themselves. Calling the lettuce "boats" makes this veggie a little more interesting and will hopefully help your kiddos try this crunchy green!
 Mashed Chickpea Salad Lettuce Boats
Prep time: 5 MinCook time: 5 MinTotal time: 10 Min
This mashed chickpea salad is a vegetarian version of the classic tuna salad and is a perfect no-cook meal that you can easily make in minutes.
Ingredients
Instructions
Check out our shop for products that teach kids to learn to love veggies! This includes veggie activity boxes, kid-safe knives, interactive placemats, and more!

We love making whole meals in one color! Have your children pick 4-5 green colored foods to serve for a meal. They can even help prepare them with you! Serve them up on a color themed plate or even in a muffin tin to make it more like a sampling platter. We hope you enjoy this yummy kid-approved recipe from Katie at Eat Pretty Darling! "Learn to Love Veggies" TipsCreating a one color meal can help picky eaters become more interested in the food they are still exploring. Let your child help pick out which green foods to put on their plate. There are SO many great green foods out there! During lunch, ask your child, "Do the different foods taste, look, and smell different even though they are the same color?". 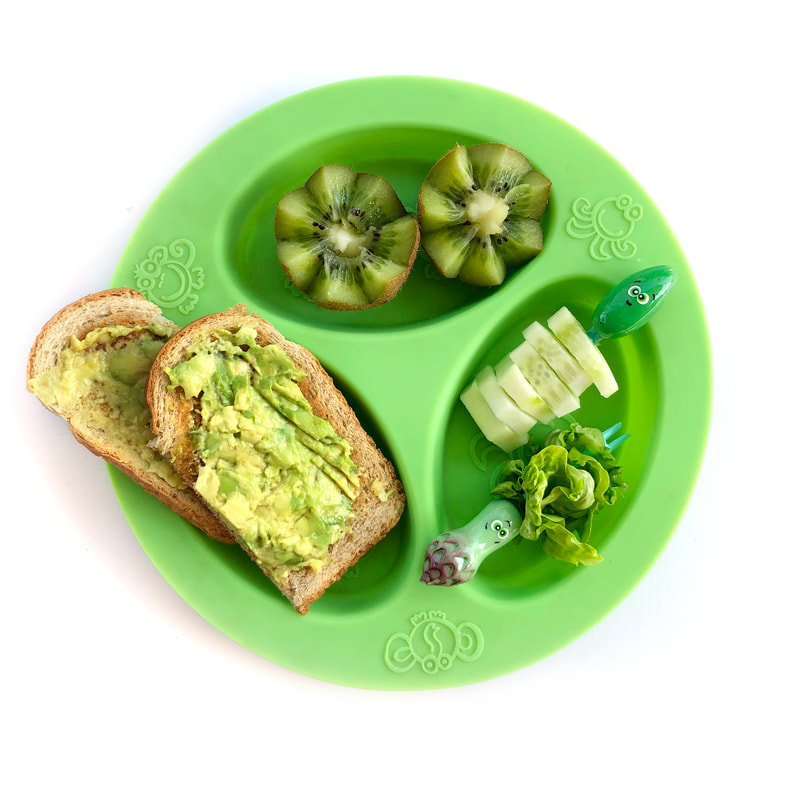 Green Food Ideas
Check out our shop for products that teach kids to learn to love veggies! This includes veggie activity boxes, kid-safe knives, interactive placemats, and more! 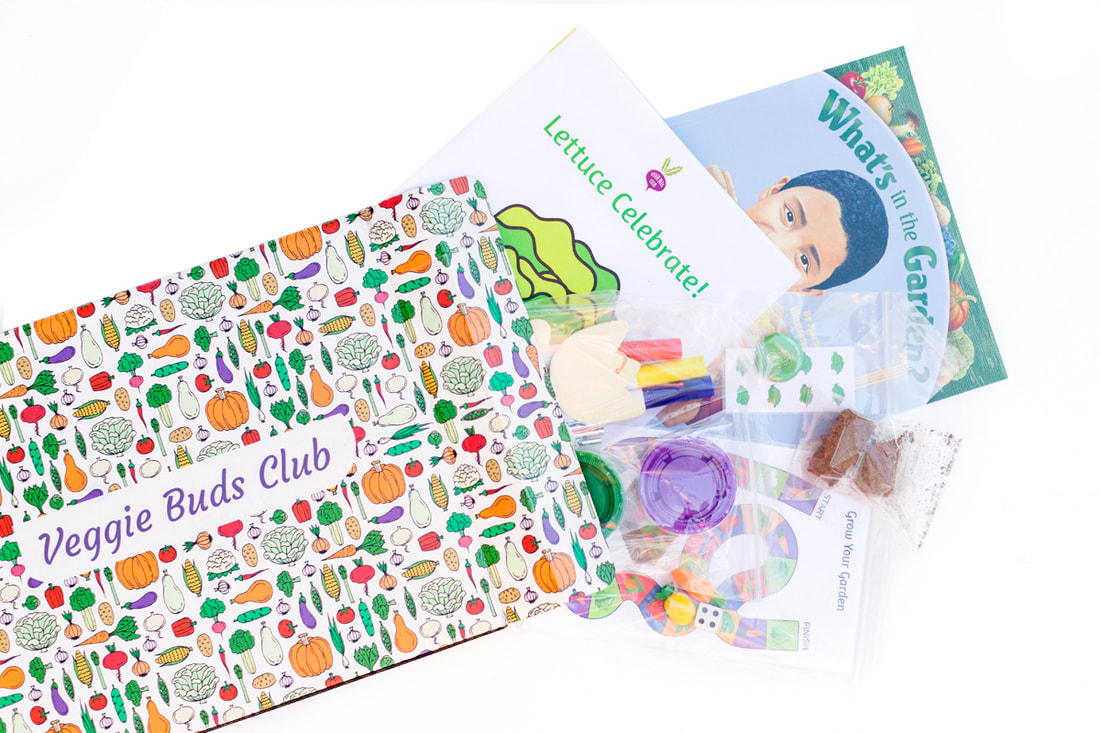
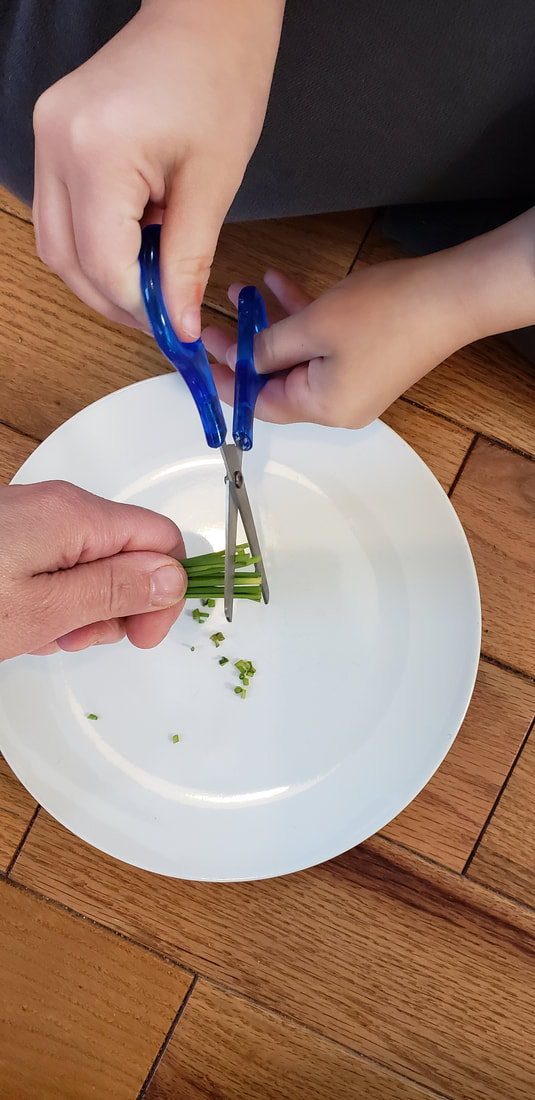
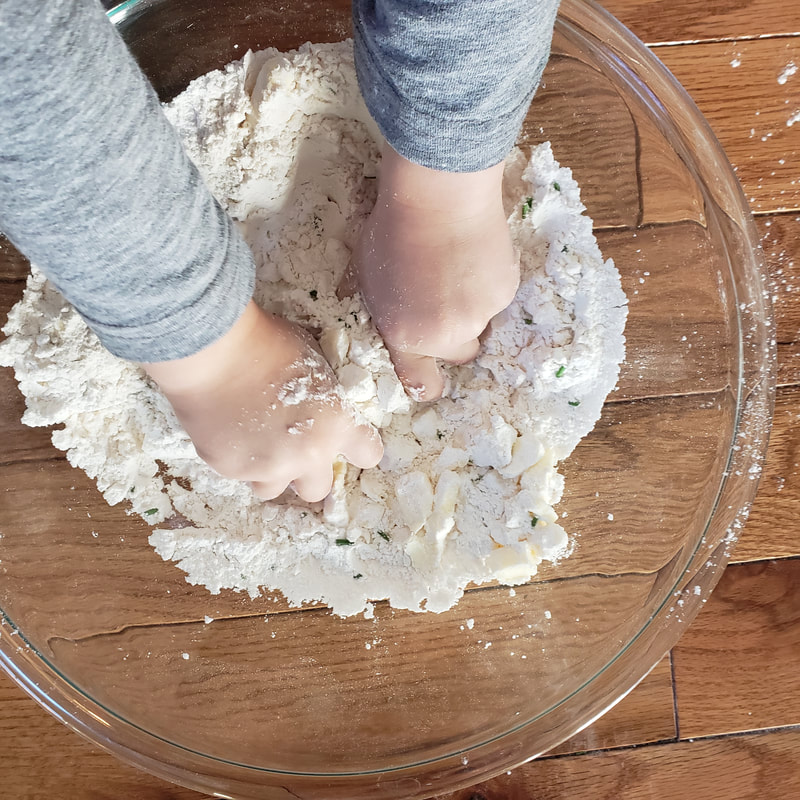
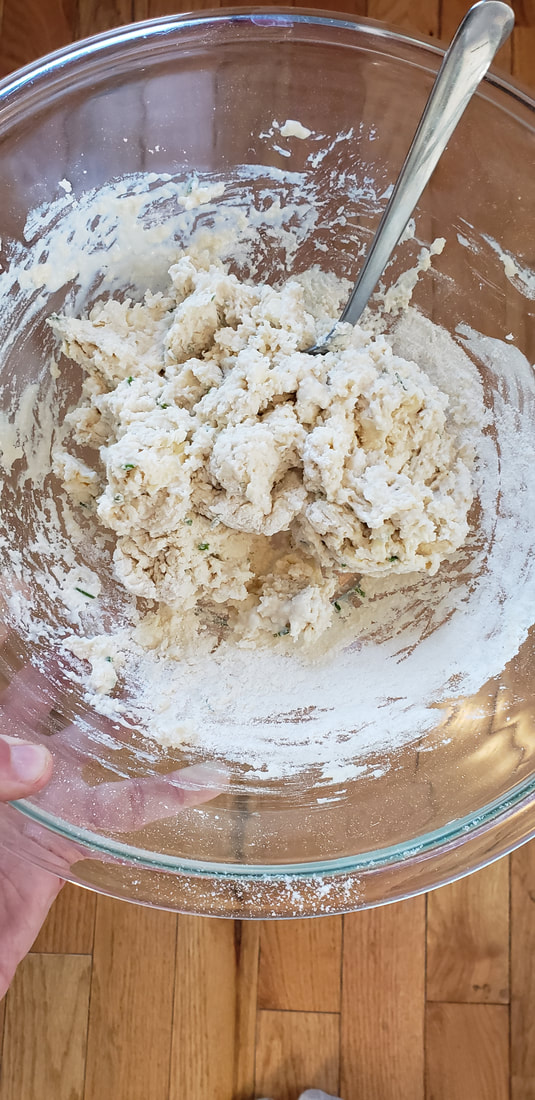
Kids love biscuits so these Chive and Cheddar Drop Biscuits are sure to be a family hit!
"Learn to Love Veggies" Tip
Drop biscuits are so simple to make and a great recipe for your child to help you with. Have your child use safety scissors to snip the chives (adult assistance may be required) and let them get messy during step #3 when they mix the batter with their hands! Finally, they can top each biscuit with the shredded cheese.
 Chive and Cheddar Drop Biscuits
Prep time: 5 MinCook time: 20 MinTotal time: 25 Min
Kids love biscuits so these Chive and Cheddar Drop Biscuits are sure to be a family hit!
Ingredients
Instructions
Check out our shop for products that teach kids to learn to love veggies! This includes veggie activity boxes, kid-safe knives, interactive placemats, and more.
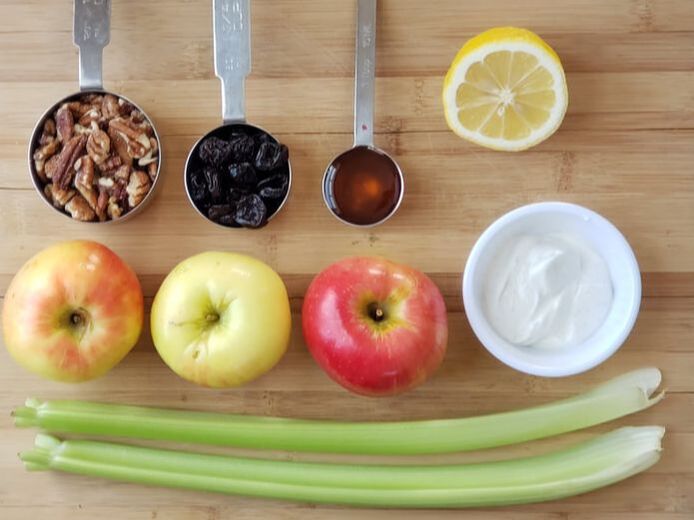
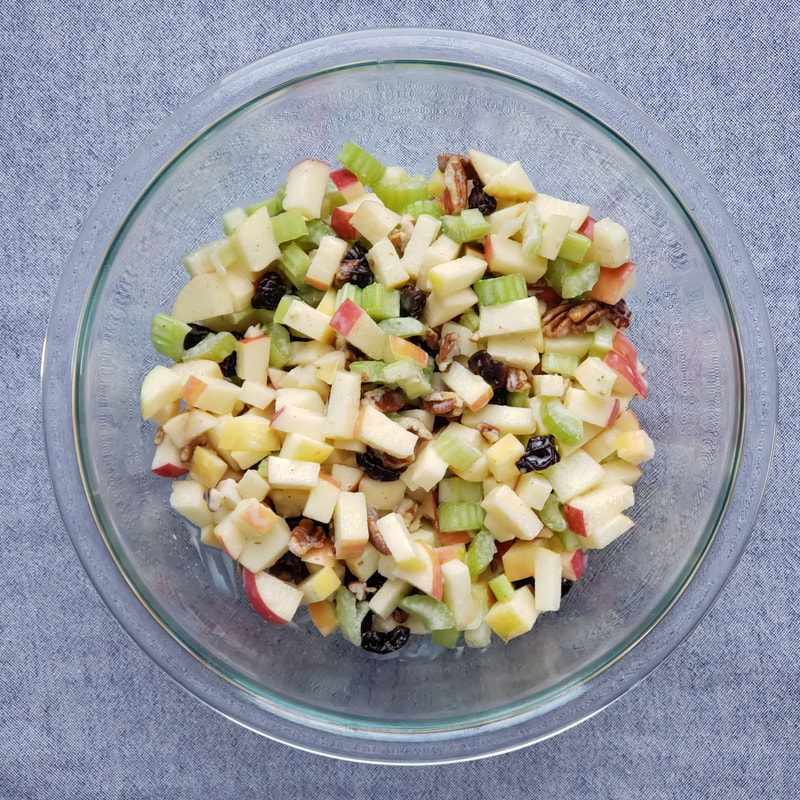
Enjoy this crunchy and sweet Waldorf Salad that's on the lighter side because of the creamy yogurt dressing!
"Learn to Love Veggies" Tip
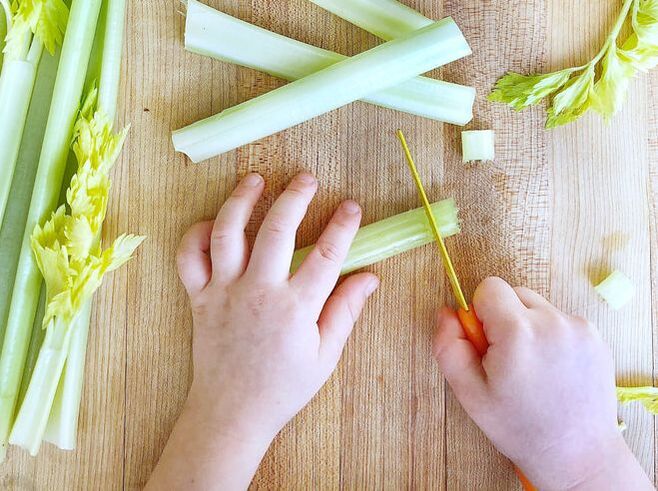
This recipe is a great introduction to celery and salad for children if they're apprehensive about both. Be sure to have them assist you with chopping the celery and apples using a kid-safe knife or butter knife and have them mix up the sweet dressing!
 Waldorf Salad with Yogurt Dressing
Prep time: 5 MinCook time: 5 MinTotal time: 10 Min
Enjoy this crunchy and sweet Waldorf Salad that's on the lighter side because of the creamy yogurt dressing!
Ingredients
Instructions
Check out our shop for products that teach kids to learn to love veggies! This includes veggie activity boxes, kid-safe knives, interactive placemats, and more.
Add an extra veggie boost to your breakfast routine with these egg muffins! They are a great make-ahead meal, simply warm up when it's time to eat. Also, if you omit the salt and pepper they are suitable for baby-led weaning finger food.
"Learn to Love Veggies" Tip
This recipe packs a veggie punch! A whole head of cauliflower is mixed into these 12 egg muffins and you can't even taste it. This truly is a great recipe to help your children learn to love cauliflower!
 Cheesy Cauliflower Egg Muffins
Yield: 12 Egg Muffins
Prep time: 5 MinCook time: 18 MinTotal time: 23 Min
Add an extra veggie boost to your breakfast routine with these egg muffins! They are a great make-ahead meal, simply warm up when it's time to eat. Also, if you omit the salt and pepper they are suitable for baby-led weaning finger food.
Ingredients
Instructions
Check out our shop for products that teach kids to learn to love veggies! This includes veggie activity boxes, kid-safe knives, interactive placemats, and more.
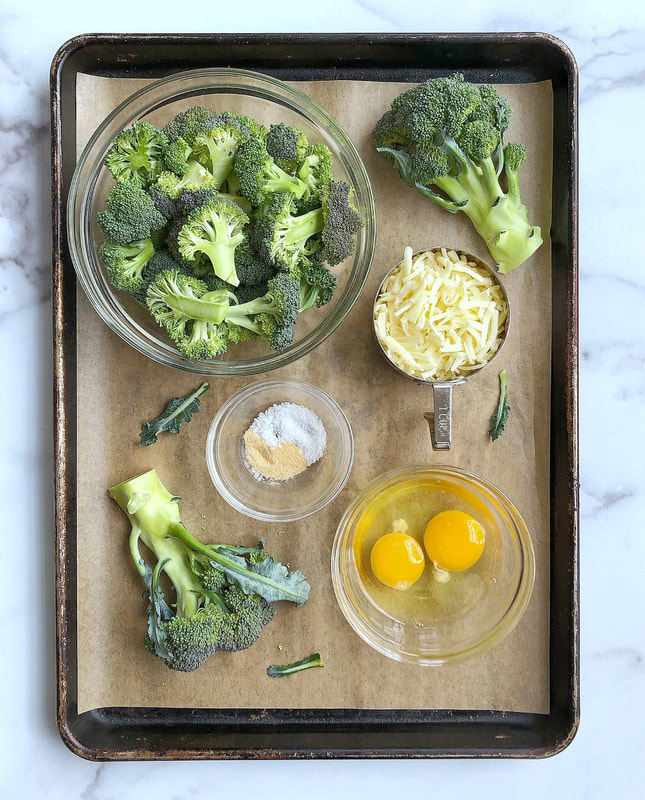
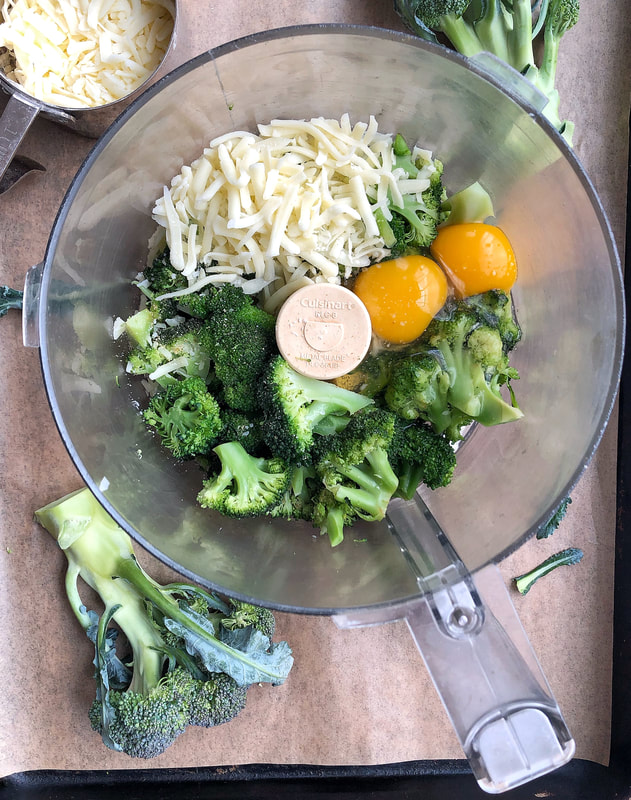
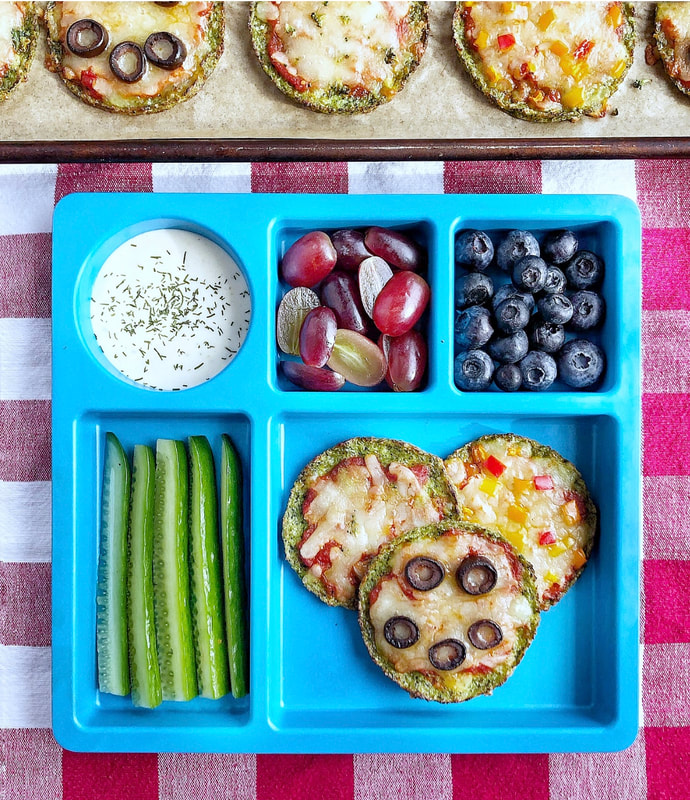
You’ve probably heard of cauliflower pizza crust, but did you know you can make your own veggie pizza crust with broccoli too?! Little chefs will love to help make this kid-favorite featuring broccoli as the star ingredient. We made the crusts mini rounds in this recipe, but feel free to form the broccoli mixture into any flat shape that you’d like (baking time may vary).
This recipe was developed by Happy Kids Kitchen for Veggie Buds Club. "Learn to Love Veggies" Tip
Get your kids in the kitchen: they can help break the broccoli head into florets, add the ingredients to the food processor, press the buttons (kids love this step!), form the crusts, and top their personal pizzas!
 Mini Veggie Pizzas with Broccoli Crust
Prep time: 5 MinCook time: 30 MinTotal time: 35 Min
You’ve probably heard of cauliflower pizza crust, but did you know you can make your own veggie pizza crust with broccoli too?! Little chefs will love to help make this kid-favorite featuring broccoli as the star ingredient.
Ingredients
Instructions
Check out our shop for products that teach kids to learn to love veggies! This includes veggie activity boxes, kid-safe knives, interactive placemats, and more.
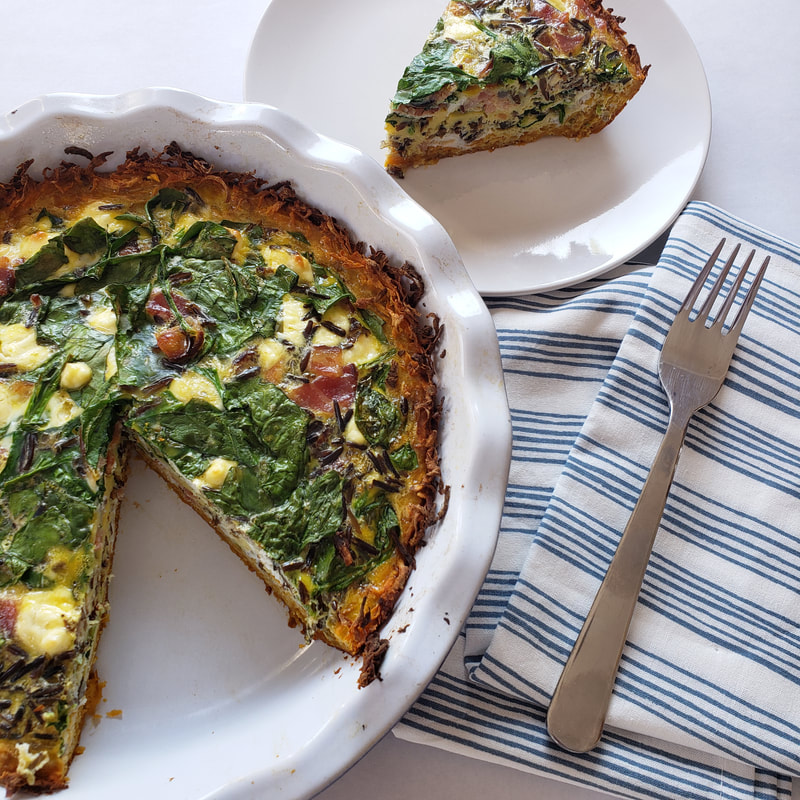
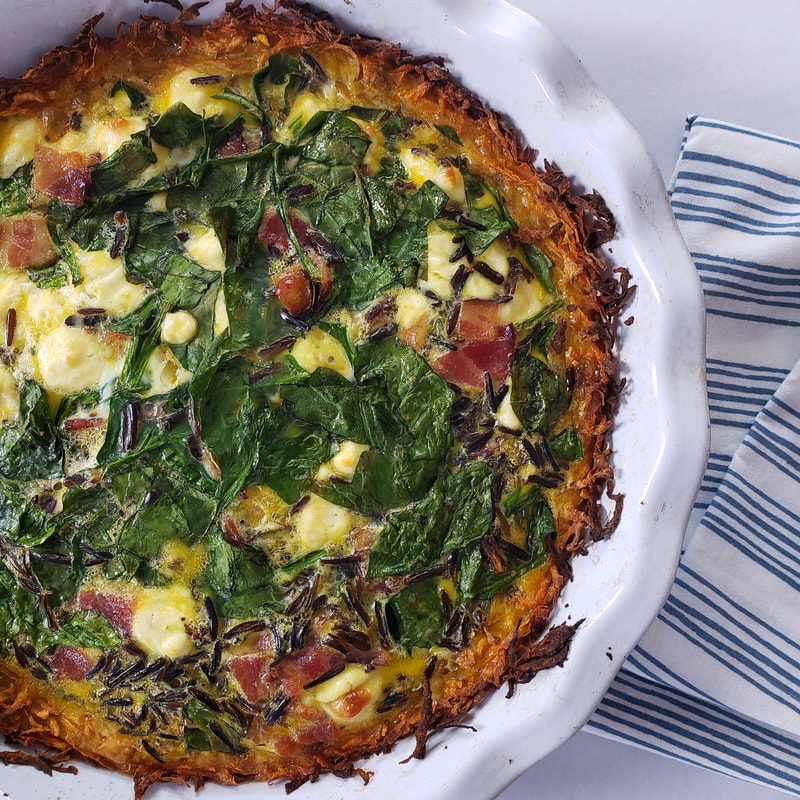
It officially feels like winter here in Minnesota and this chilly weather has me craving seasonal comfort food. We always like to pack extra veggies into meals here at Veggie Buds Club so I hope you enjoy this tasty spin on quiche... use shredded sweet potato crust ! I chose to fill my quiche with wild rice, fresh spinach, bacon, and goat cheese but quiche is such a versatile meal, feel free to omit or add a wide variety of veggies, meat, and cheese.
"Learn to Love Veggies" Tip
Get your kids in the kitchen: I made this quiche start to finish with my 4 year old son and he tried the ingredients as we went along (grated sweet potato! spinach! bacon! wild rice! even goat cheese... not a fan but he tried it!).
 Sweet Potato Crust Quiche
Prep time: 10 MinCook time: 60 MinTotal time: 1 H & 10 M
This recipe sure is a tasty spin on quiche... use shredded sweet potato for the crust! We chose to fill this quiche with wild rice, fresh spinach, bacon, and goat cheese but quiche is such a versatile meal, feel free to omit or add a wide variety of veggies, meat, and cheese.
Ingredients
Instructions
Check out our shop for products that teach kids to learn to love veggies! This includes veggie activity boxes, kid-safe knives, interactive placemats, and more.
|