|
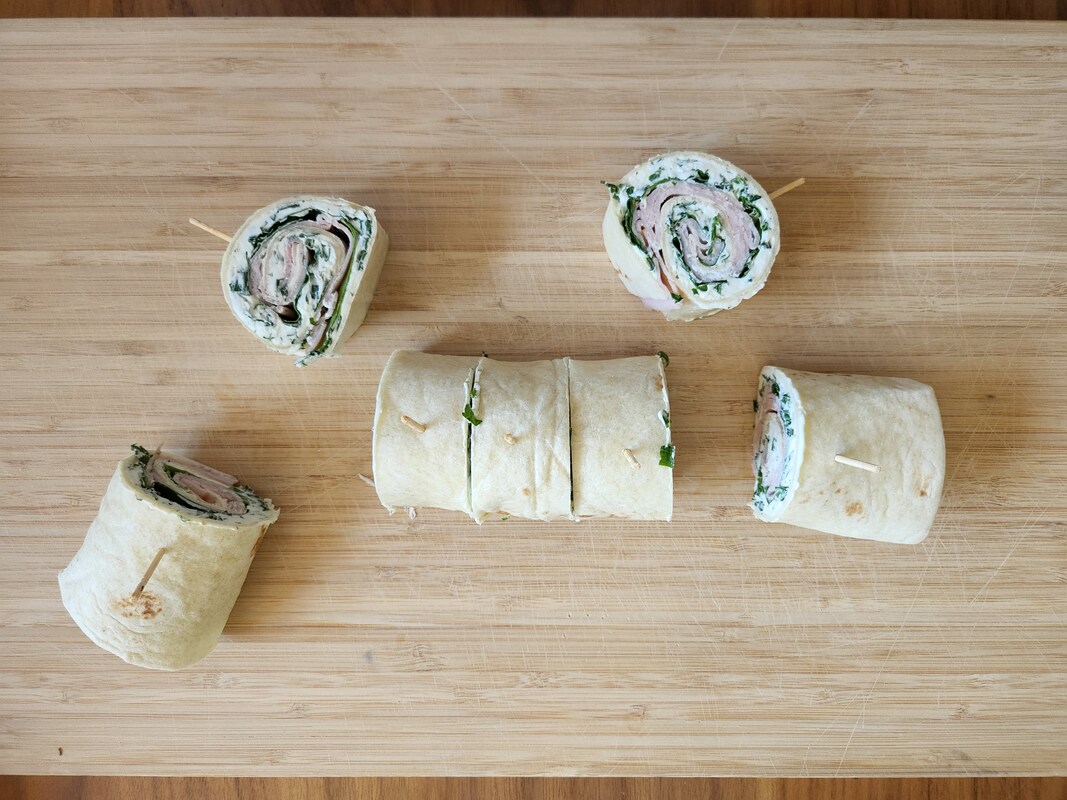
Here's another tasty kid-friendly recipe that features our simple Herbed Cream Cheese spread! These Spinach & Turkey Roll Ups make for a tasty lunch... perfect for a picnic or pot luck!
"Learning to Love Veggies" Tip
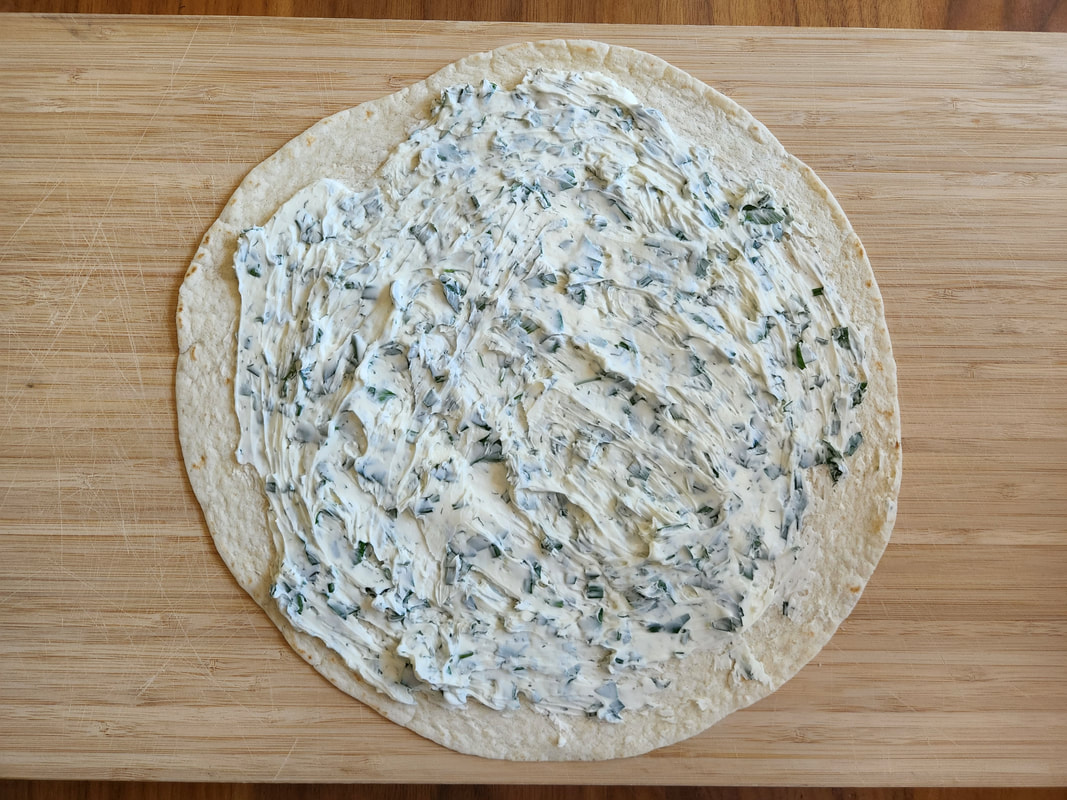
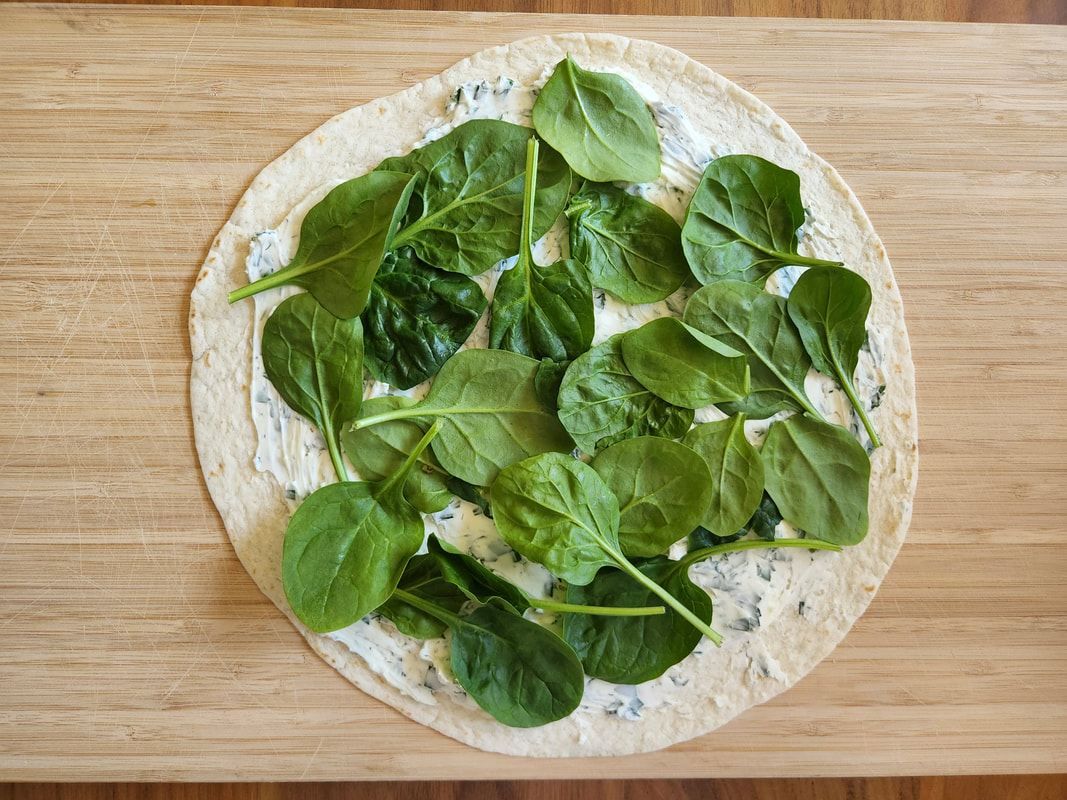
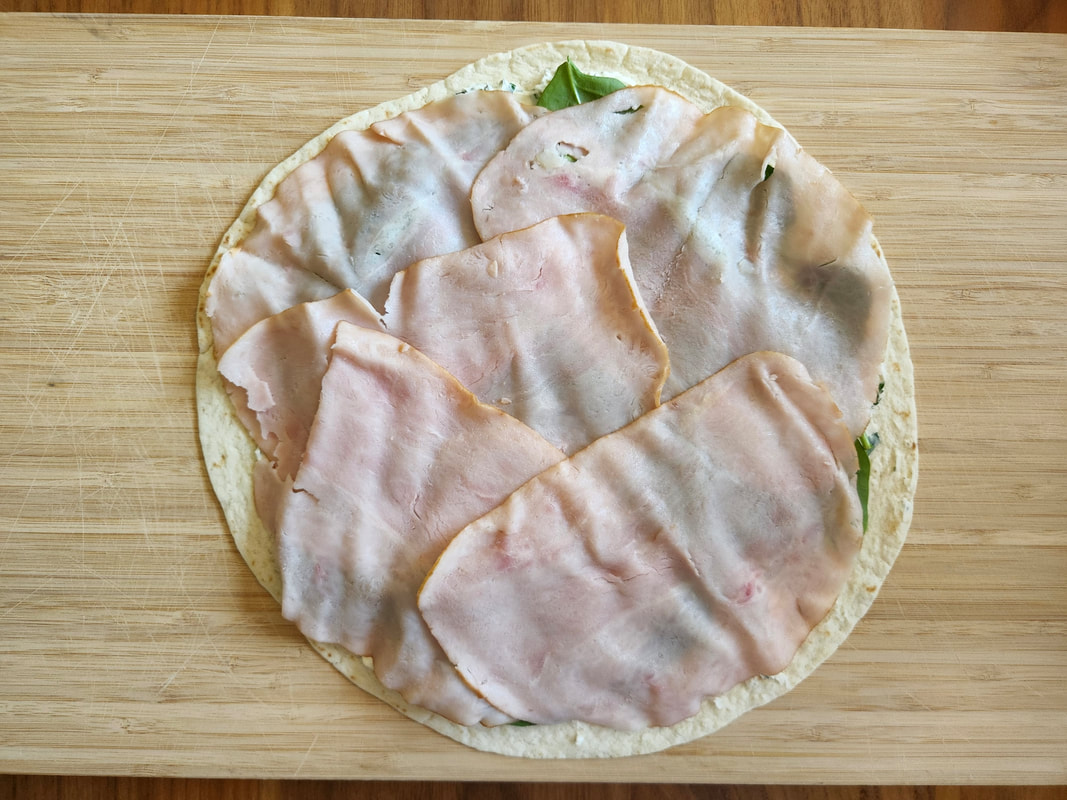
This is a great recipe to help your children learn to love spinach! The spinach flavor and texture is well hidden in these Spinach & Turkey Roll Ups although kids can still see that this leafy green is inside. Have your child help prep the roll ups, first they can spread the cream cheese on a large tortilla, then top with spinach and turkey, and roll it up!
 Spinach & Turkey Roll Ups
Yield: 8 "roll ups"
Here's another great kid-friendly recipe that features our simple Herbed Cream Cheese spread! These Spinach & Turkey Roll Ups make for a tasty lunch- perfect for a picnic lunch or pot luck!
Ingredients
Instructions
Want to teach your kids to learn to love veggies?! We have a solution! Check out our veggie-packed printable recipe and activity books for children. You can find them over in our Teachers Pay Teachers shop. These popular interactive guides have been downloaded by thousands of parents, teachers, and care takers!
0 Comments
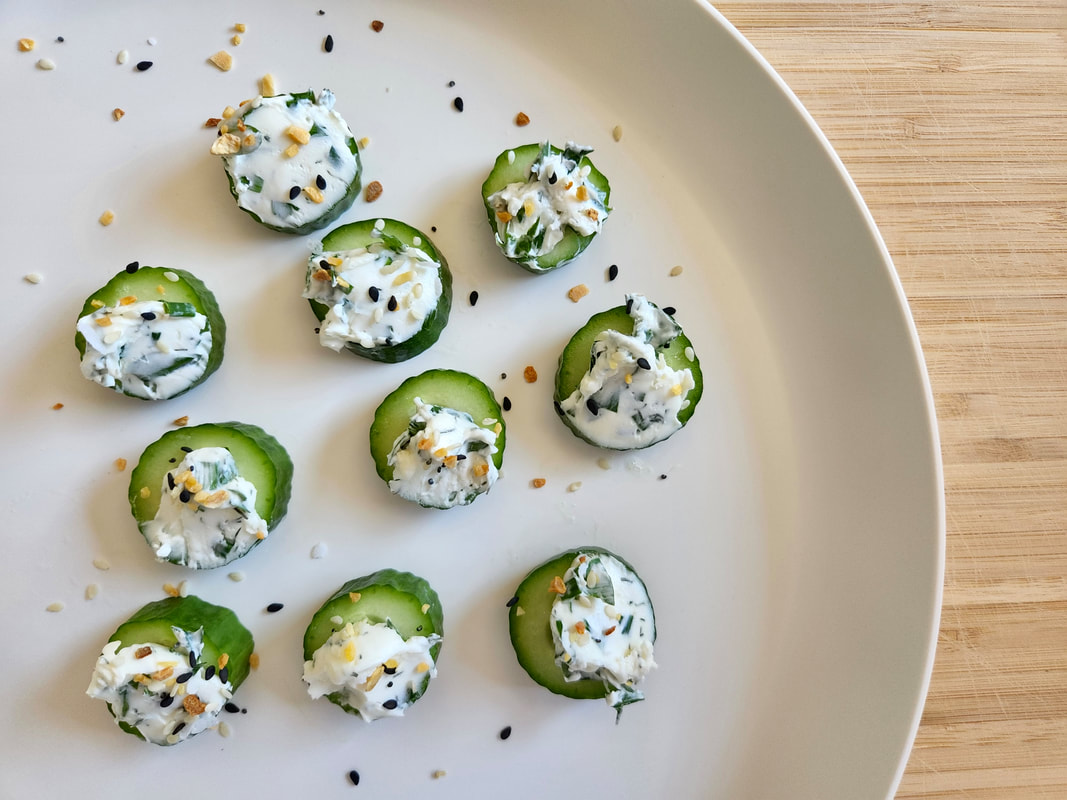
These Cucumber "Bagel" Bites are an absolutely delicious kid-friendly appetizer or snack! Bring them to your next potluck and they are sure to be a hit!
"Learn to Love Veggies" Tip
Have your child help slice a cucumber into "coin" shapes and top with a store bought Veggie Cream Cheese or our delicious Herbed Cream Cheese. Finally, they can sprinkle on the seasoning and voila... it's the perfect bite-sized veggie snack!
 Cucumber "Bagel" Bites
These Cucumber "Bagel" Bites are an absolutely delicious kid-friendly appetizer or snack! Bring them to your next potluck and they are sure to be a hit!
Ingredients
Instructions
Want to teach your kids to learn to love veggies?! We have a solution! Check out our veggie-packed printable recipe and activity books for children. You can find them over in our Teachers Pay Teachers shop. These popular interactive guides have been downloaded by thousands of parents, teachers, and care takers!
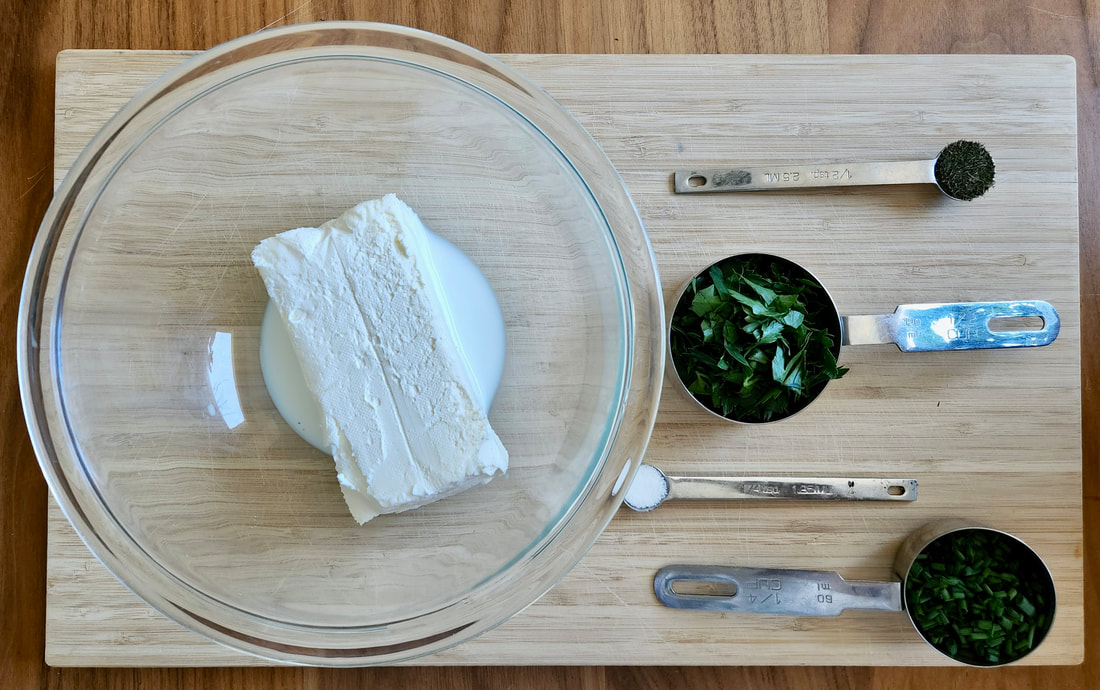
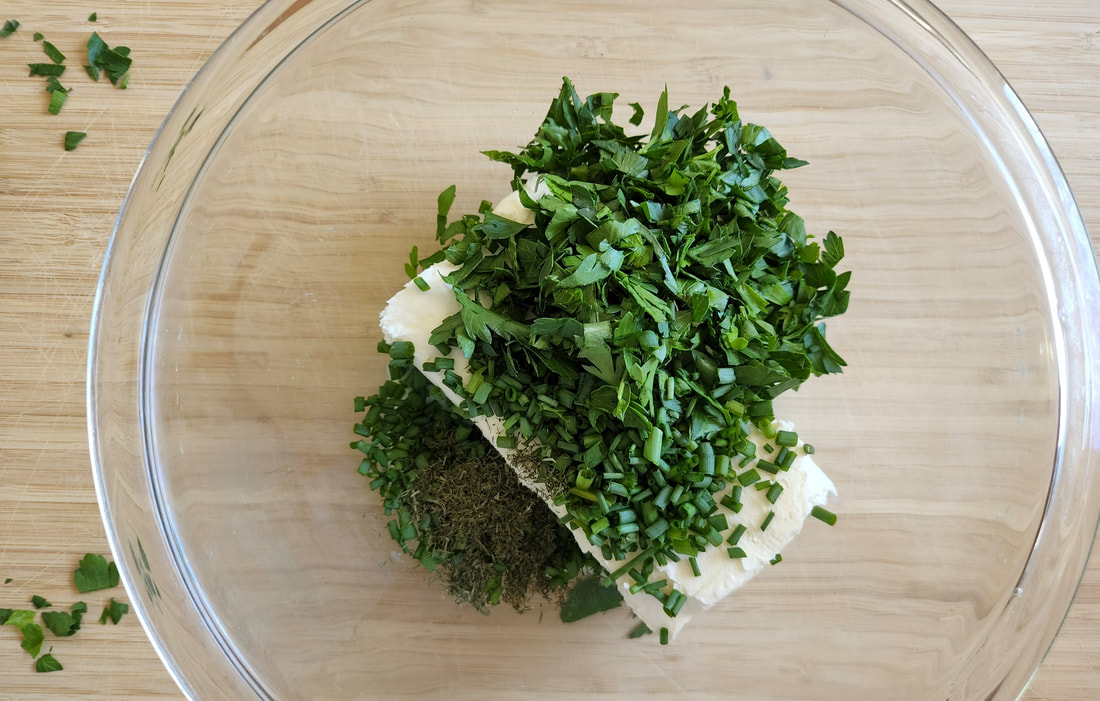
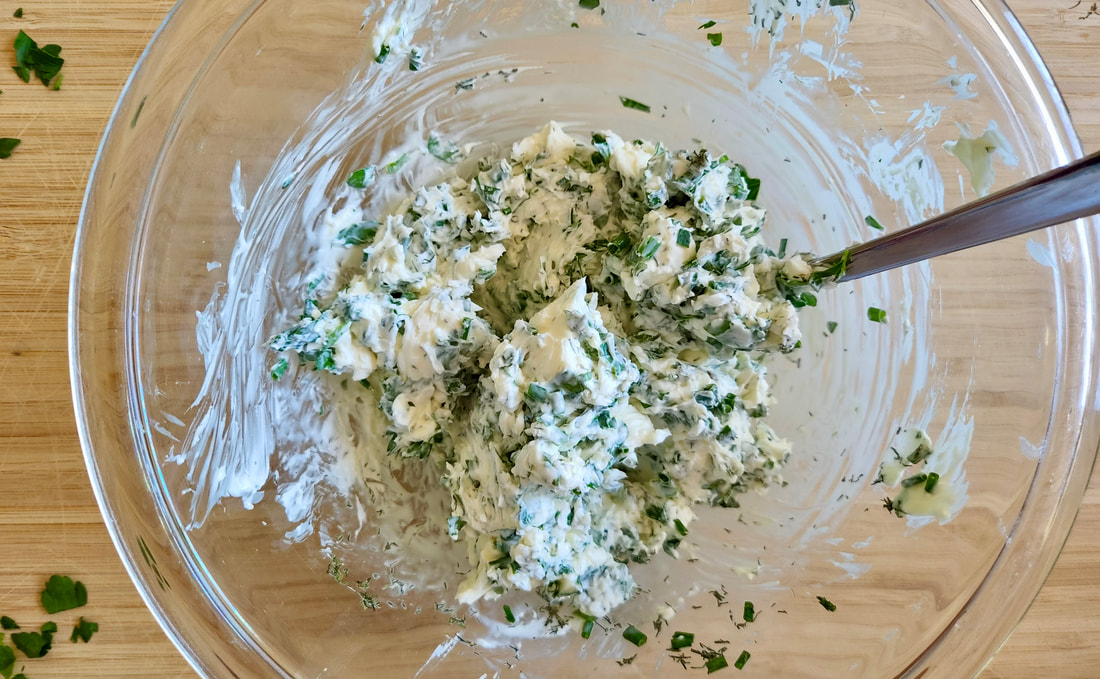
This cream cheese is packed full of fresh flavor with green herbs! You can spread it on bagels or sandwiches, use it as a fresh veggie dip, make these scrumptious and kid-friendly Cucumber "Bagel" Bites, or make these yummy Spinach and Turkey Roll Ups (great for a picnic lunch or potluck!).
"Learn to Love Veggies" Tip
Adding fresh herbs or veggies to cream cheese makes a great veggie-packed dip for those kiddos out there that are dip lovers! And it's so simple to make, be sure to have your kids help with the preparation!
 Simple Herbed Cream Cheese
Prep time: 5 MinCook time: 5 MinTotal time: 10 Min
This cream cheese is packed full of fresh flavor with green herbs! You can spread it on bagels or sandwiches, use it as a fresh veggie dip, or top cucumber "coins" for a healthy appetizer.
Ingredients
Instructions
Want to teach your kids to learn to love veggies?! We have a solution! Check out our veggie-packed printable recipe and activity books for children. You can find them over in our Teachers Pay Teachers shop. These popular interactive guides have been downloaded by thousands of parents, teachers, and care takers!
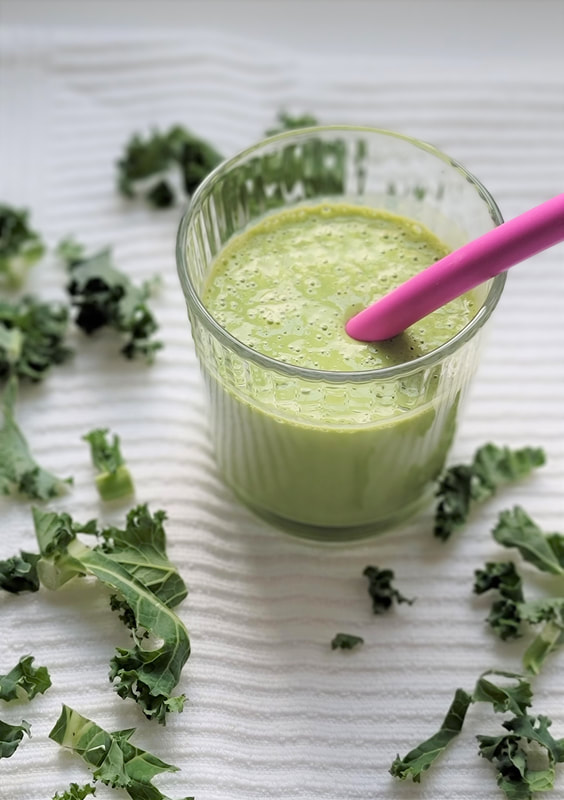
This green smoothie is packed with nutrition from the 2 heaping cups of kale inside but the frozen tropical fruit masks that dark leafy green flavor and makes for one delicious drink! This smoothie is definitely kid-approved and a great way to start the day or get your greens in during snack time.
"Learn to Love Veggies" Tip
Exposing children to kale in a smoothie form is a great first recipe for kiddos that may be to scared to try it in a salad, "chips", or a baked good yet. Have your child help make this smoothie with you so they can watch the dark leafy greens transform into a pretty light green smoothie!
 Tropical Kale Smoothie
Yield: 2 8-ounce smoothies
This green smoothie is packed with nutrition from the 2 heaping cups of kale inside but the frozen tropical fruit masks that dark leafy green flavor and makes for one delicious drink!
Ingredients
Instructions
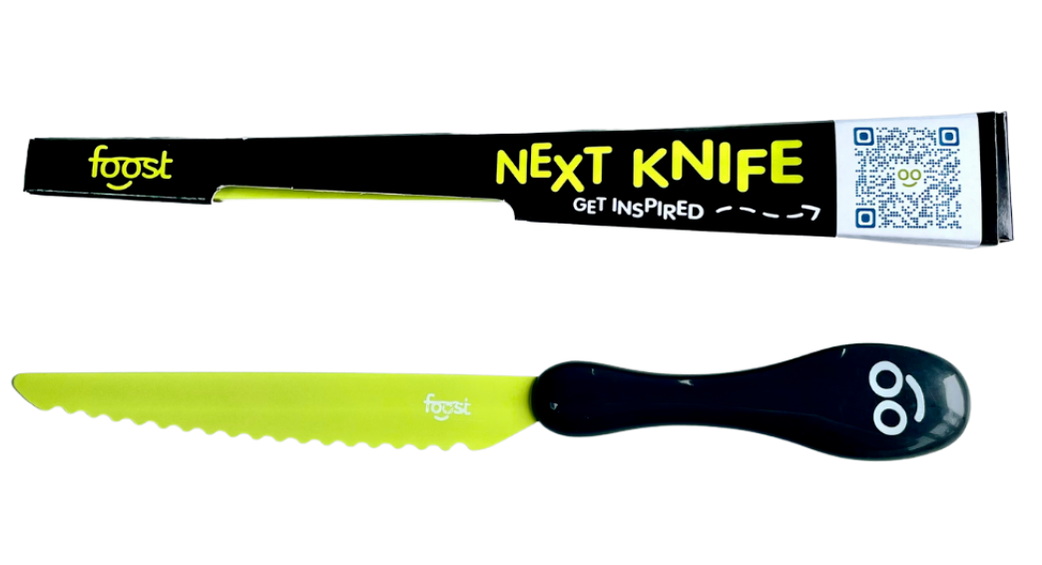
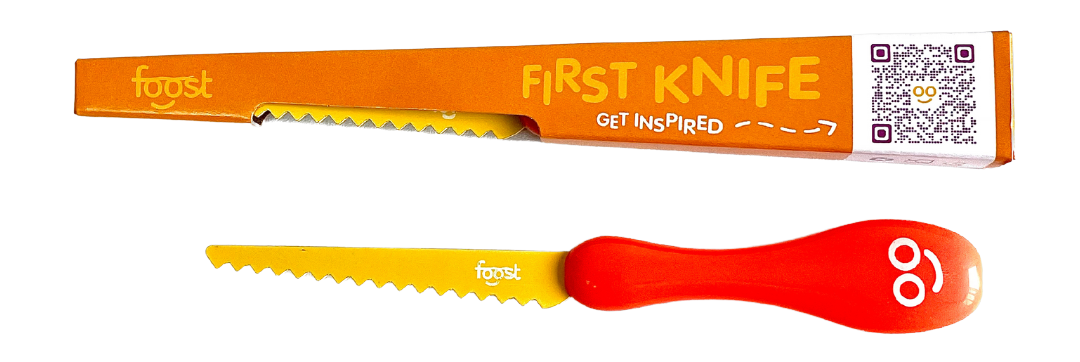
Get cooking with your kids! Purchase our recommended kid-safe knife from our friends at Foost :)

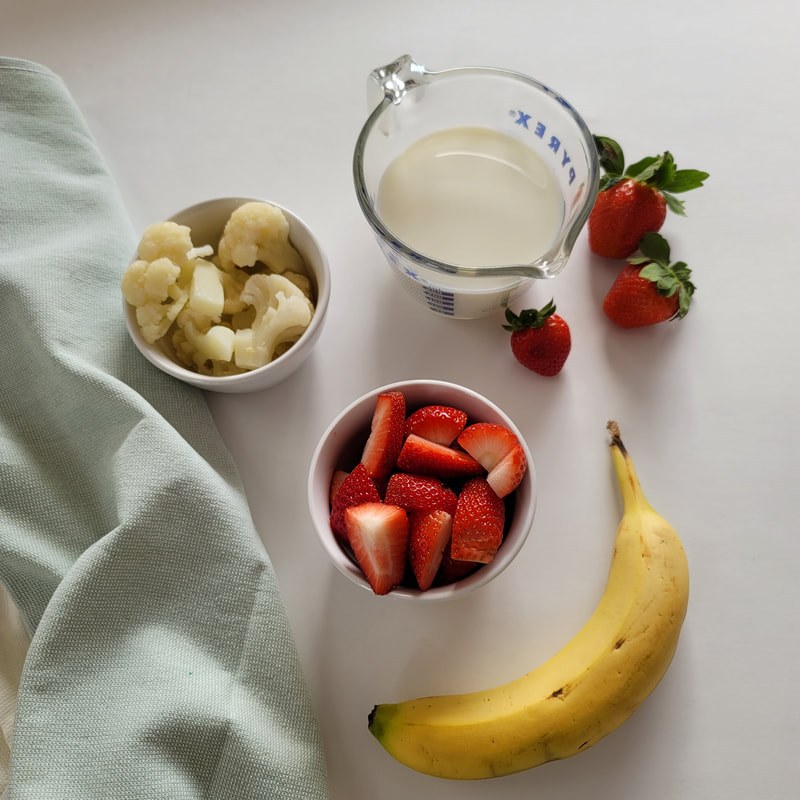
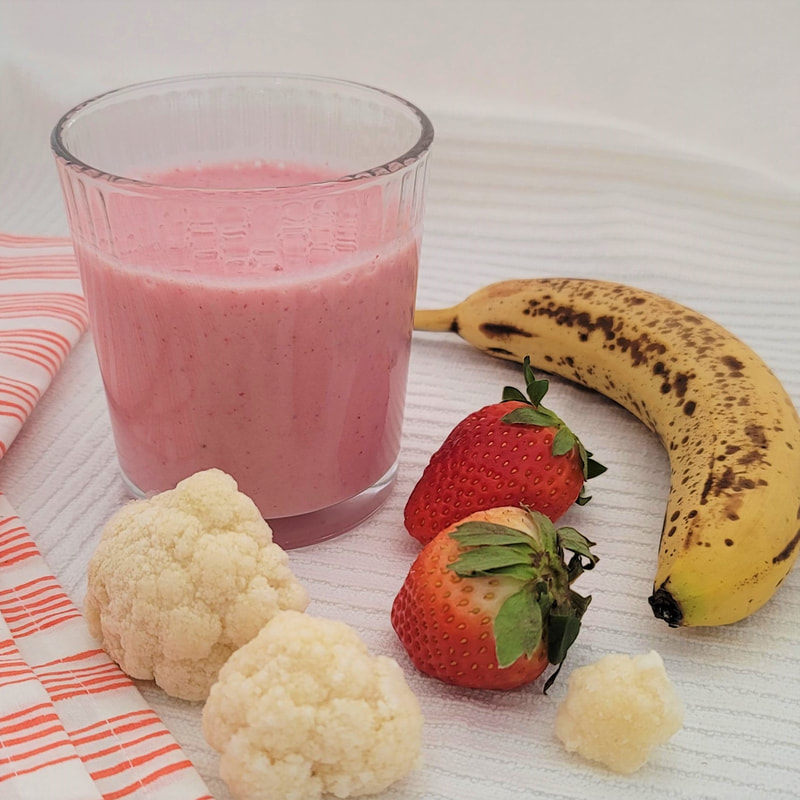
Give the classic Strawberry Banana smoothie a veggie-boost with some added cauliflower! You won't be able to taste or see the cauliflower and your smoothie will include a daily serving of veggies, it's a win-win!
Learn to Love Veggies Tip
Adding veggies to smoothies is a great way to introduce vegetables to children who are still apprehensive about eating them plain. Have your child make this smoothie with you so they know the cauliflower is in it, once they press the start button it's like magic... *poof* the cauliflower disappears!
 Smoothie") Strawberry Banana (& Cauliflower!) Smoothie
Yield: 3 8-oz smoothies
Give the classic Strawberry Banana smoothie a veggie-boost with some added cauliflower! You won't be able to taste or see the cauliflower and your smoothie will include a daily serving of veggies, it's a win-win!
Ingredients
Instructions
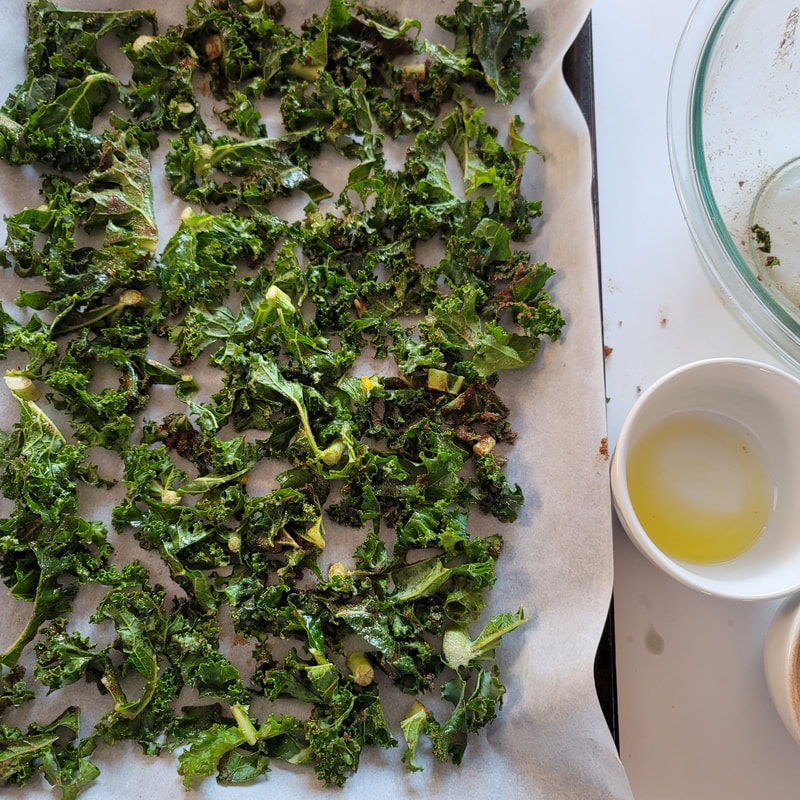
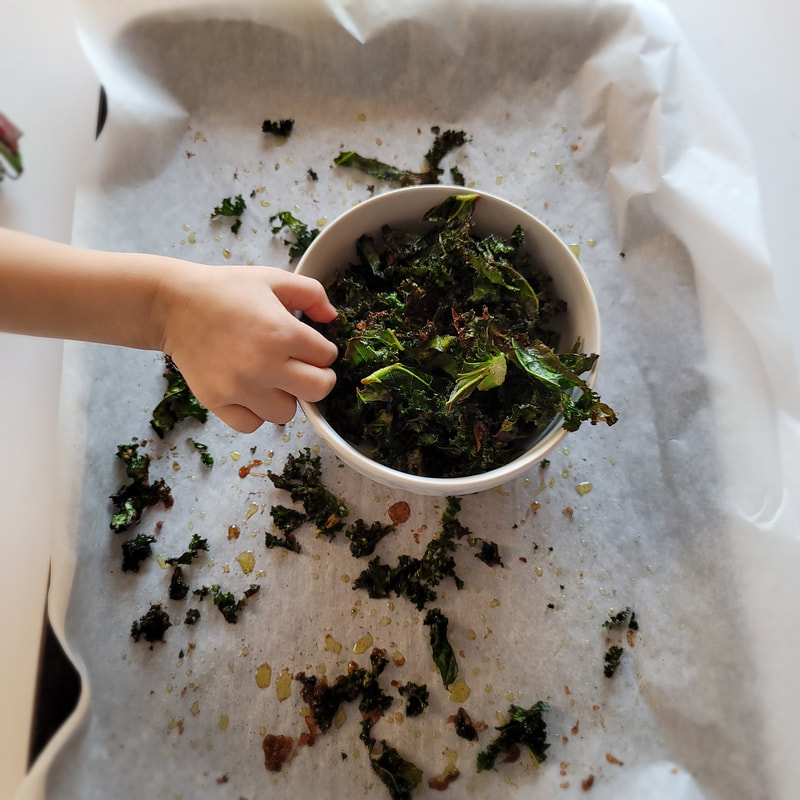
These sweet and crunchy kale chips are seriously addictive and definitely kid-approved! With only 4 ingredients they're super simple to whip up for a snack.
"Learn to Love Veggies" Tip
Your kids can help make these kale chips from start to finish! First, they can rip up the kale leaves, then place them in a bowl and coat with cinnamon-sugar and olive oil. Finally, they can spread them out on a baking sheet and you (the adult!) can pop them in the oven.
 Cinnamon Sugar Kale Chips
Yield: 2-3 cups
These sweet and crunchy kale chips are seriously addictive and definitely kid-approved! With only 4 ingredients they're super simple to whip up for a snack.
Ingredients
Instructions
Get cooking with your kids! Purchase our recommended kid-safe knife from our friends at Foost :)
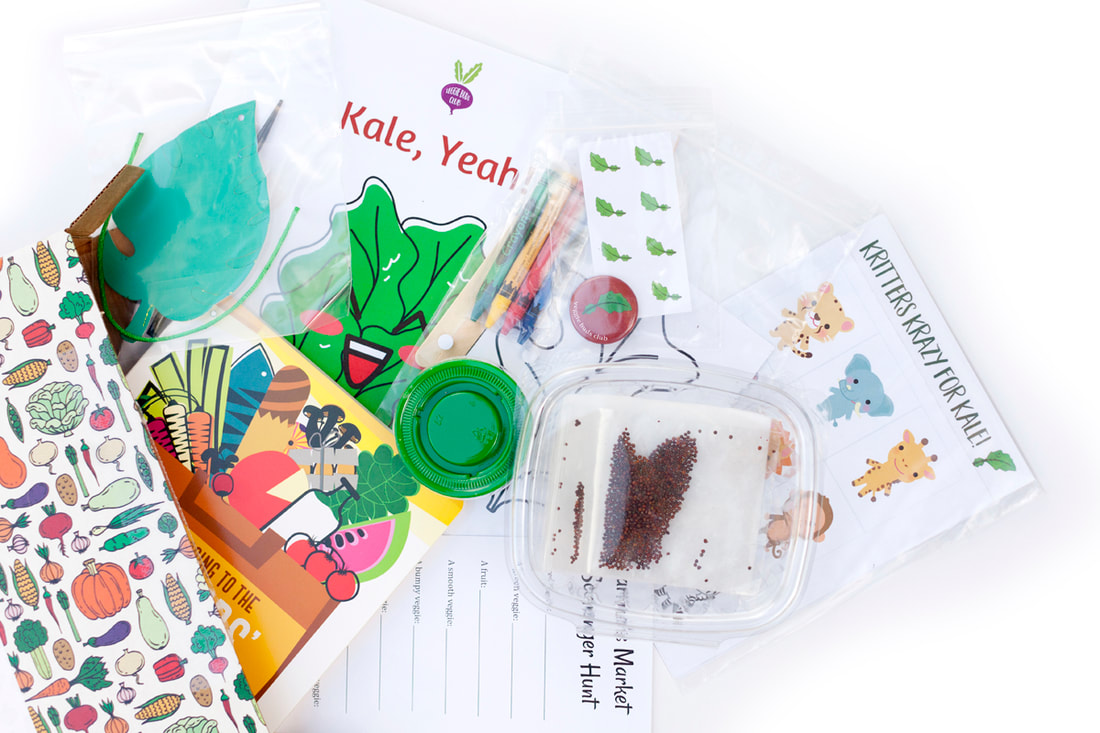
This fun and simple game is guaranteed to get your kids excited about trying kale! You can pair this game with one of the many delicious kid-friendly kale recipes that we have on our blog such as this silly Kale Monster Smoothie Bowl, these crispy Kale Crackers, or this gorgeous Rainbow Kale Salad!
First download and print our "Kritters Krazy for Kale Game" PDF then follow the instructions below.
 Kritters Krazy for Kale Game
This fun and simple game is guaranteed to get your kids excited about trying kale!
Materials
Instructions
2 Player Game
Get cooking with your kids! Purchase our recommended kid-safe knife from our friends at Foost :)

Have you ever roasted corn? Cooking the fresh kernels at a high temperature, intensifies the corn's sweetness and takes corn flavor to a whole new level. The sweet kernels get golden brown and crunchy around the edges, making them reminiscent of popcorn. Roasted corn is great as a side dish, on its own, or combined with other fresh, seasonal produce like in our Roasted Corn and Watermelon Salsa recipe.
This recipe was developed by Happy Kids Kitchen for Veggie Buds Club. "Learn to Love Veggies" Tip
Get your kids in the kitchen to help prepare the corn for the oven. They can help transfer the cut corn to a bowl, drizzle the corn with oil, sprinkle the salt, and spread the corn on the baking sheet. Simple, delicious, and easy... what could be better?!
 Simple Roasted Corn
Prep time: 5 MinCook time: 15 MinTotal time: 20 Min
Roasting fresh corn kernels at a high temperature intensifies the corn's sweetness and takes the corn flavor to a whole new level. The sweet kernels get golden brown and crunchy around the edges, making them reminiscent of popcorn.
Ingredients
Instructions
Get cooking with your kids! Purchase our recommended kid-safe knife from our friends at Foost :)
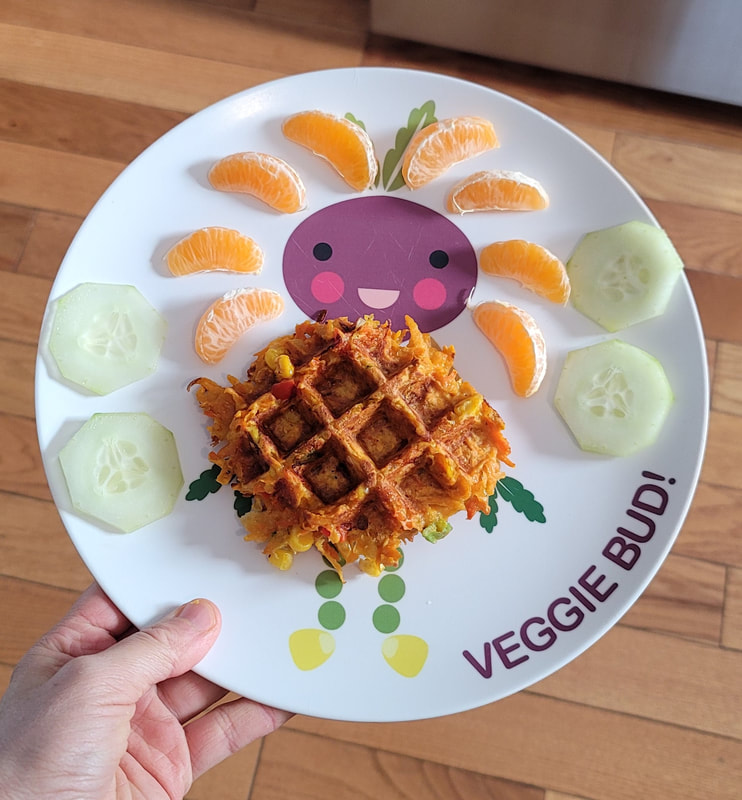
These savory veggie-packed waffles are great for breakfast, lunch, or a snack any time of the day. Experiment with the ingredients, you can add or omit veggies from this recipe and still have a delicious outcome! These Rainbow Veggie Waffles taste great paired with sour cream and/or applesauce, you can find our recipe for pretty pink Beet Applesauce here.
"Learn to Love Veggies" Tip
Give your child some "power" over this recipe and have them help pick out the veggies for these savory waffles! The base of the waffles are shredded sweet potatoes and carrots but the extras are very flexible. We have used sweet corn, bell pepper, and green onion in this recipe but you can add or omit these... some other great veggies that you can include are cubed zucchini, frozen peas, chopped green beans, and fresh herbs!
Get cooking with your kids! Purchase our recommended kid-safe knife from our friends at Foost :)
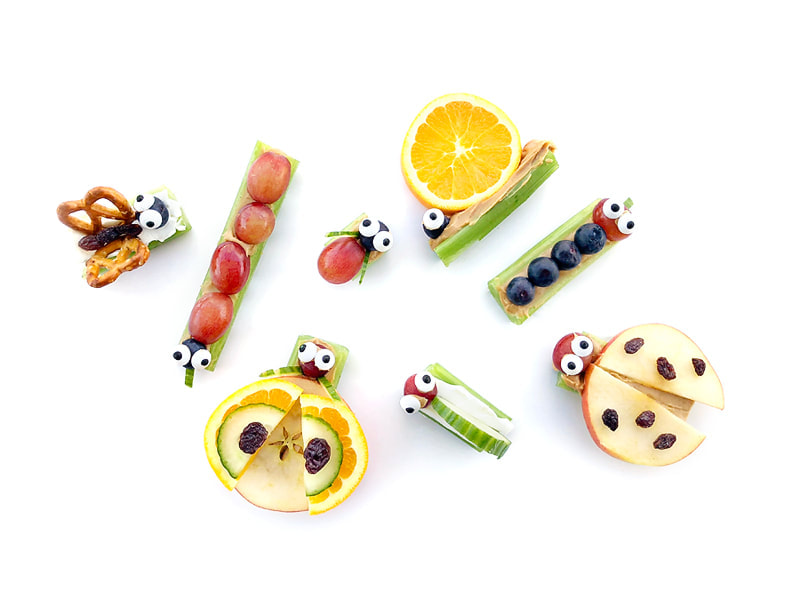
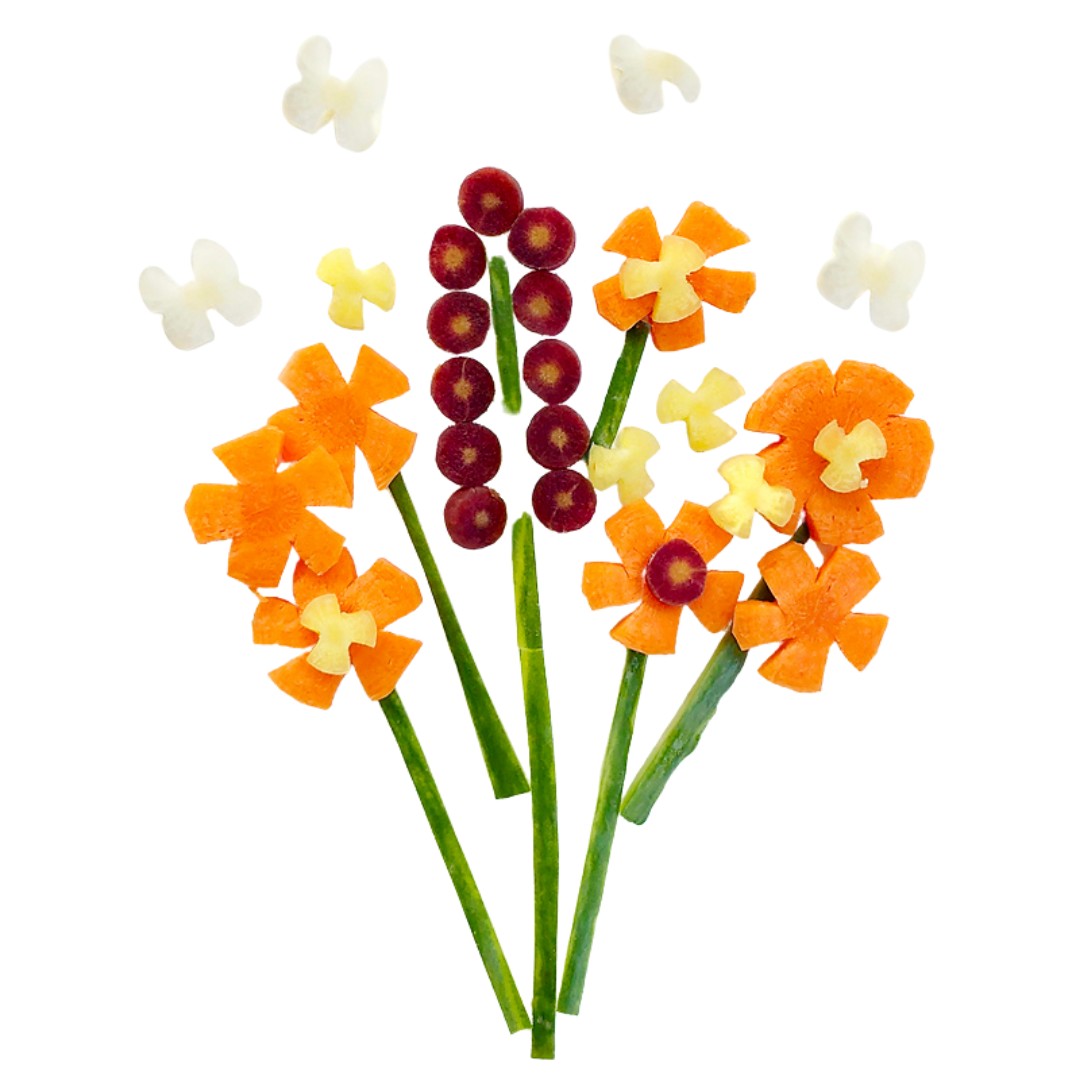
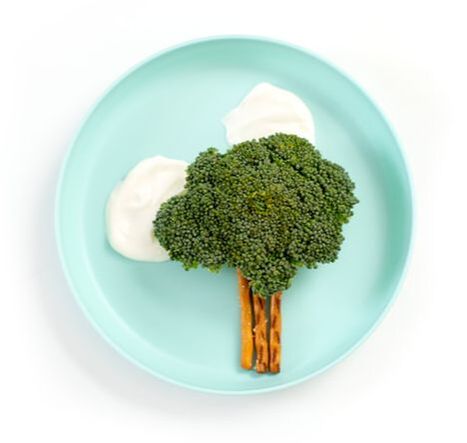
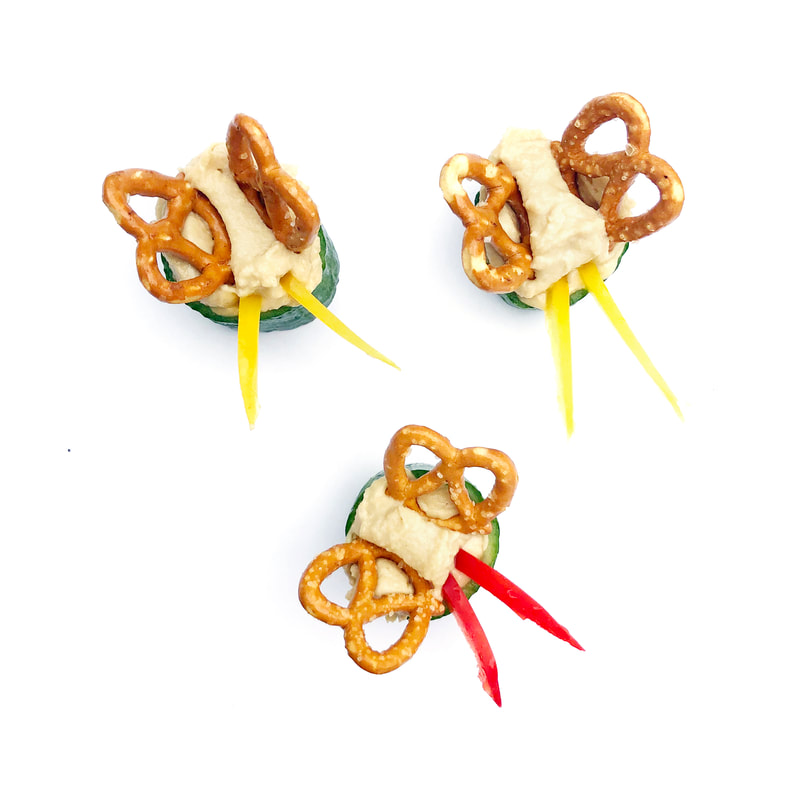
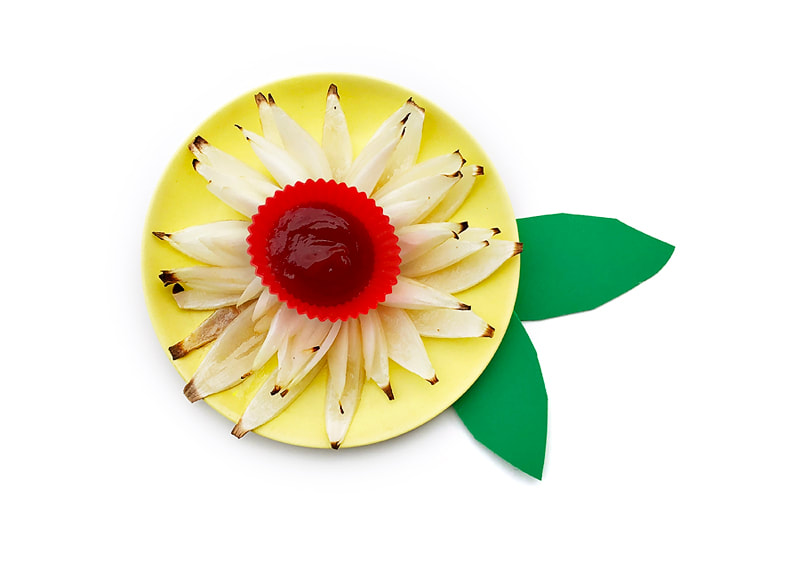
We have featured many simple veggie art projects for kids over the years here at Veggie Buds Club! Food art is a great way to get children interested in trying veggies. We "eat with our eyes", right?! So making food look pretty is a great strategy to get kids excited about eating it. Click on the links below to learn how to make each veggie art project or click here to see ALL of the veggie art projects that we have featured on our blog! Celery Bugs: Let your kids make their bugs and you might just be surprised by their creativity! From snakes to snails, ladybugs to butterflies, the possibilities are endless.
Carrot Bouquet: If your kiddos are still learning to like carrots, try making them into a fun flower shape! Radish Planet: Turning a radish into something that’s out of the world is super simple with just three tasty ingredients! Broccoli Tree: Broccoli florets look like little trees just as they are... so let's take it up a notch and make a whole scene for your forest! Cucumber Butterflies: These cucumber butterflies are so easy to make and so adorable! Onion Flower: Simply slicing and baking turns this veggie into a beautiful bloom! |
|||