|
This is a fun brownie recipe that you can make with your kids that includes nutrition from peas, avocado, and hemp hearts! If you want to make them peanut free you can use almond butter or sun butter in place of the peanut butter.
This recipe was developed by Motherhood and Meals for Veggie Buds Club. "Learn to Love Veggies" Tip
Creating a good relationship with food means enjoying treats along the way. We like to add extra nourishment to treats by including some veggies in the ingredient list!
 Pea Brownies
Prep time: 7 MinCook time: 25 MinTotal time: 32 Min
This is a fun brownie recipe that you can make with your kids that includes nutrition from peas, avocado, and hemp hearts! If you want to make them peanut free you can use almond butter or sun butter in place of the peanut butter.
Ingredients
Instructions
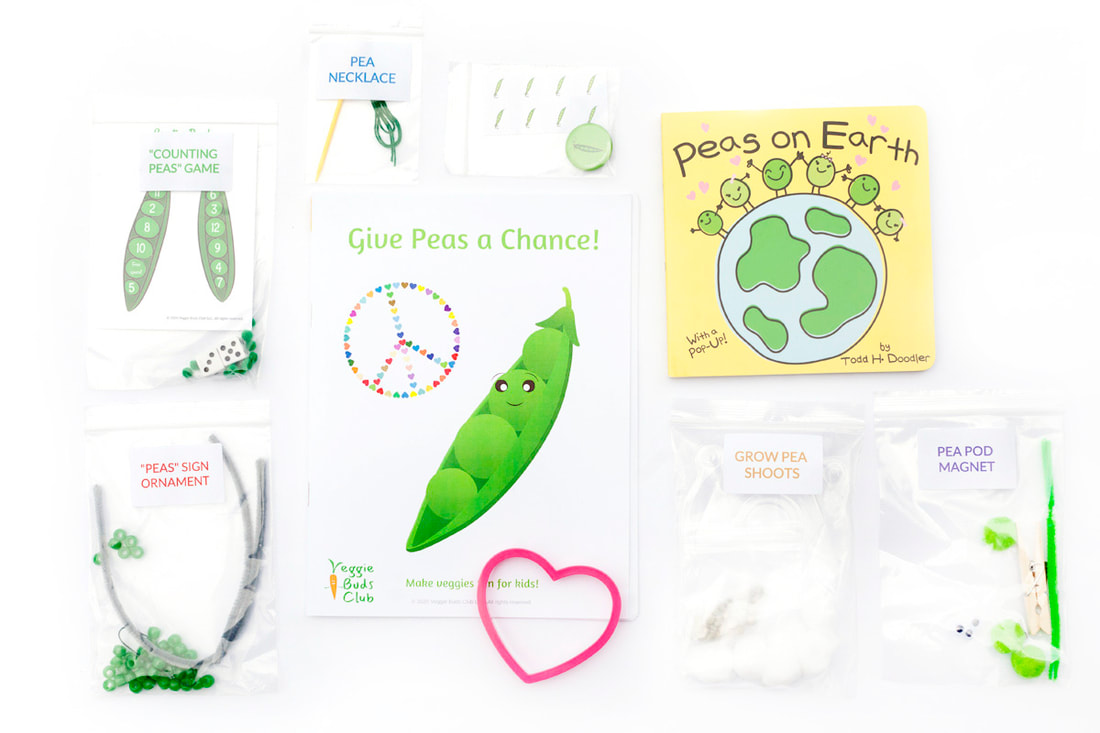
Check out our shop for products that teach kids to learn to love veggies! This includes veggie activity boxes, kid-safe knives, interactive placemats, and more.
0 Comments
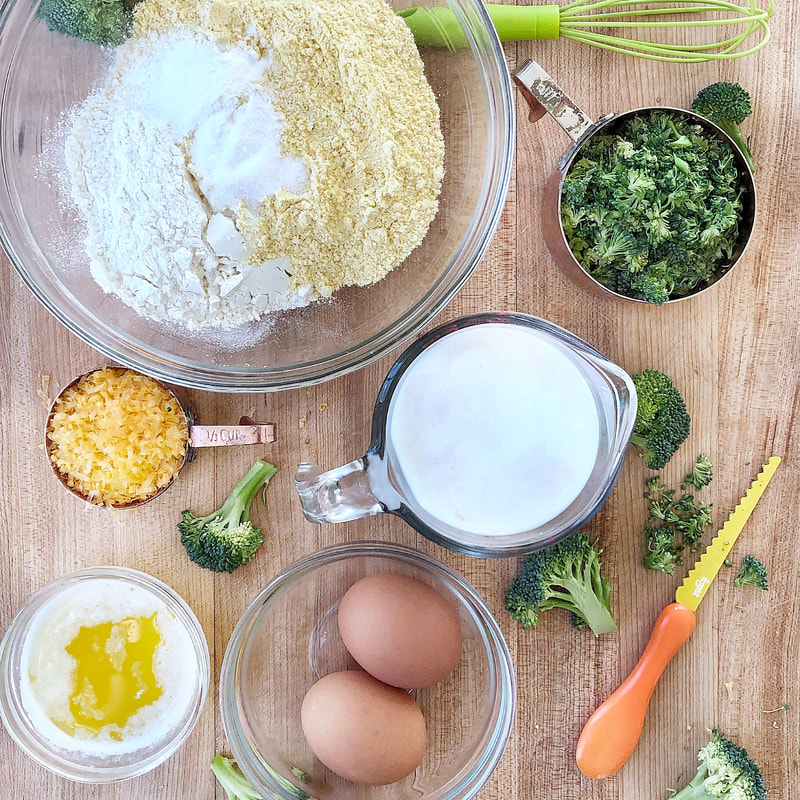
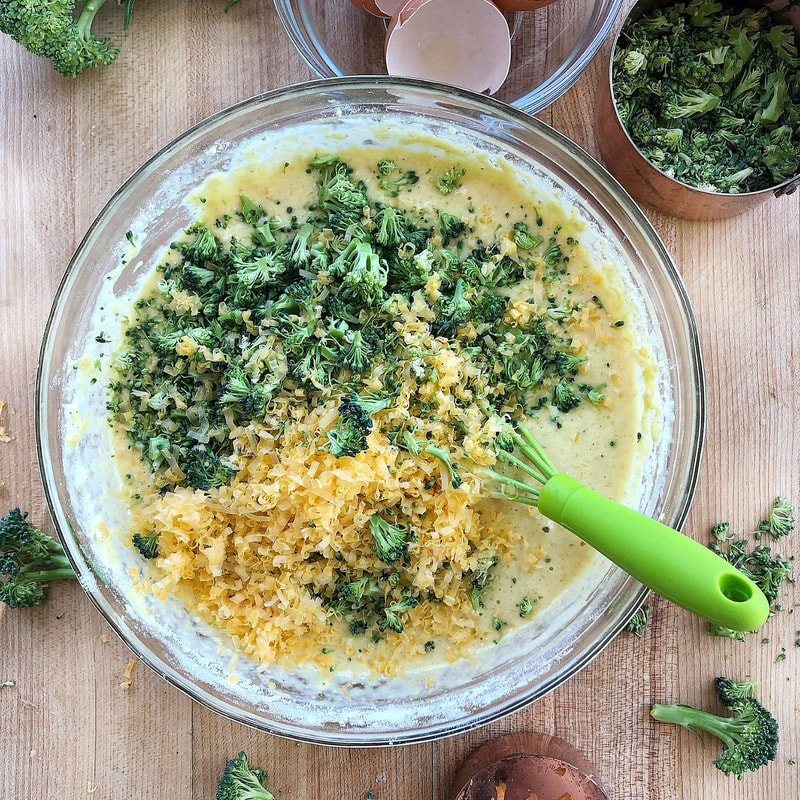
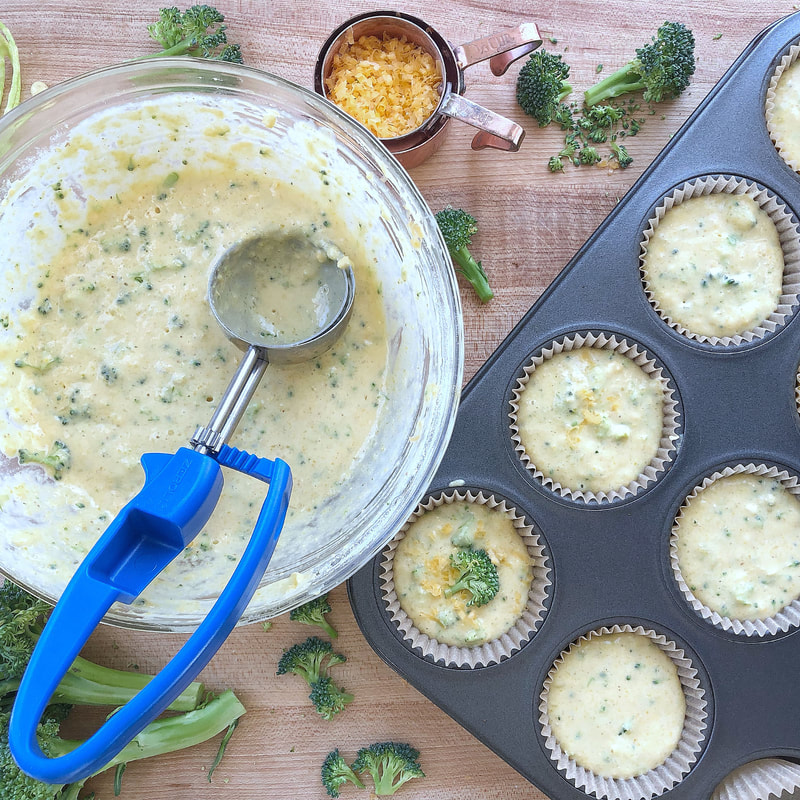
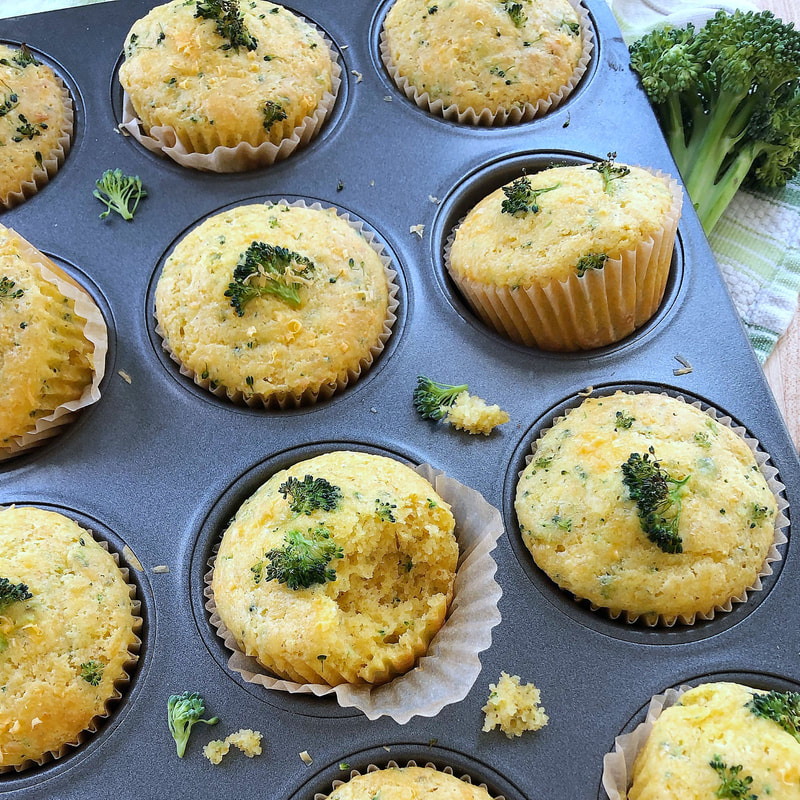
Have you ever made savory muffins? They are a fun and delicious way to get veggies into your day! Broccoli can be a little tricky for small hands to chop, so have your child help break apart the florets then practice sawing back and forth to trim the broccoli “leaves” off the “tree.” Chop the broccoli alongside your little chef and if he or she gets tired of cutting, your child can always help transfer the chopped broccoli to a measuring cup. Kids will also love to help by cracking the eggs, measuring the ingredients, and mixing everything all together. Enjoy! 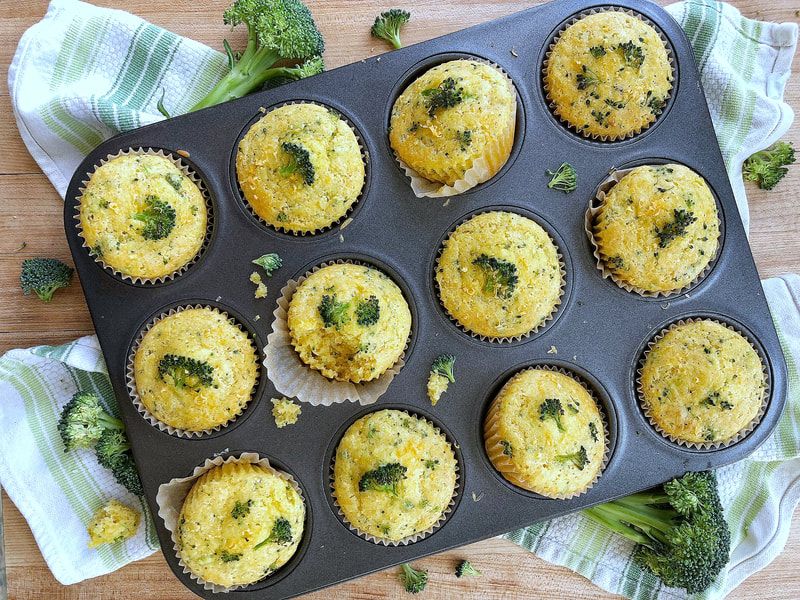 This recipe was developed by Heather Staller, a mom of two boys, ages 6 and 3, and cooking instructor specializing in bringing cooking into preschool classrooms. After college, Heather knew she wanted to be a teacher, but first followed her lifelong dream of going to culinary school. Teaching cooking combines both of her passions, and she truly enjoys introducing young children to the joys of cooking with fresh ingredients. Find Heather on Instagram (@heather.happykidskitchen), where she shares inventive kid-friendly recipes and ideas for cooking with kids at home. Broccoli Cornbread MuffinsIngredients
Want some great products that teach kids to learn to love veggies?
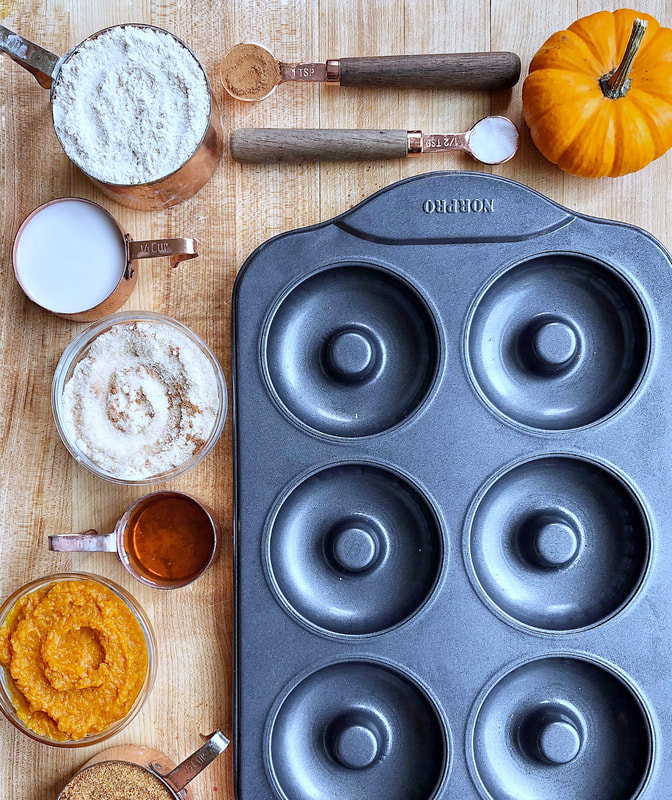
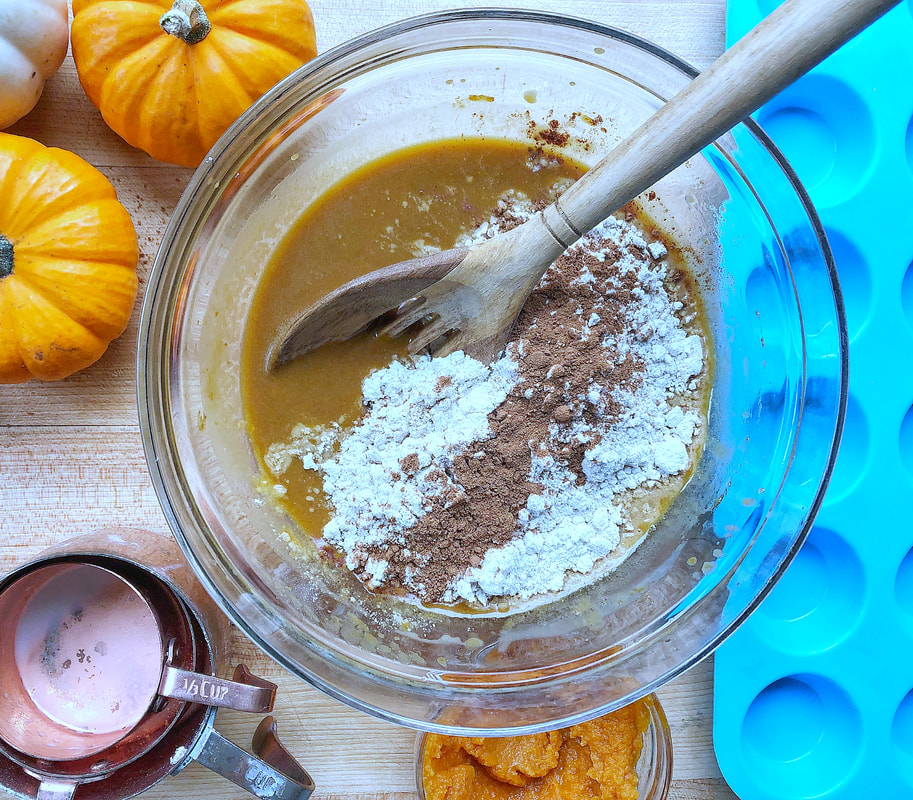
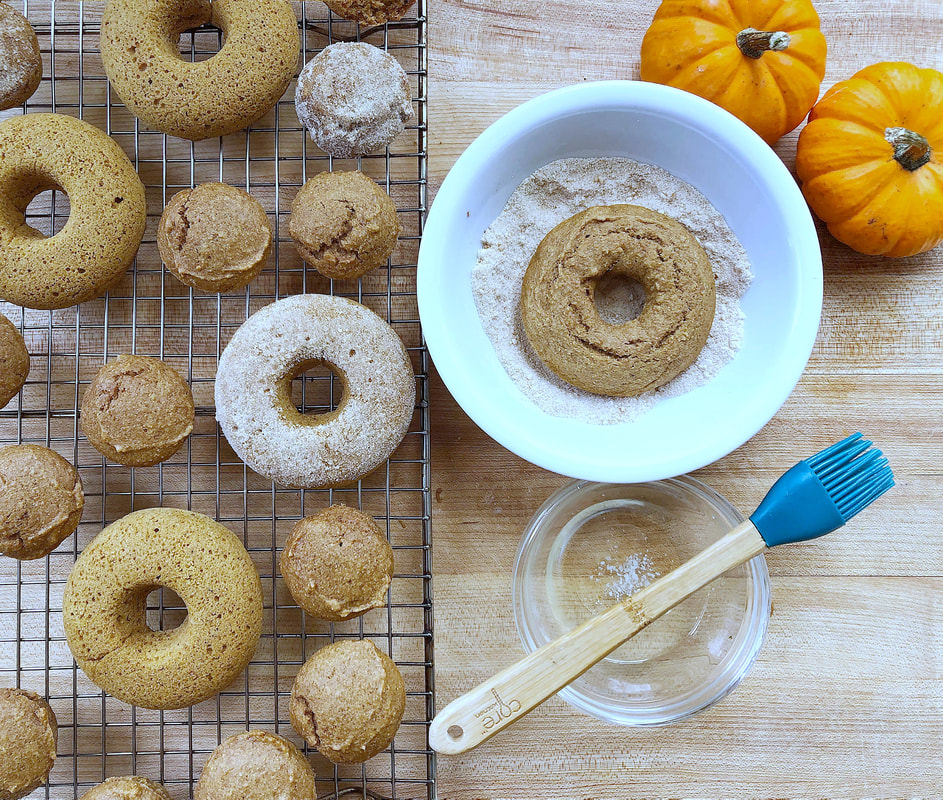
Check out our shop for kid-safe knives, interactive placements, and veggie-themed activity boxes! Whether you use homemade pumpkin purée or pumpkin from a can, these wholesome baked donuts are the most delicious way to celebrate this month's veggie! Don't worry if you don't have a donut pan. You can bake up the same batter in a mini muffin pan and call them donut holes! Your little chef is going to love measuring, mixing, and scooping the batter. The pumpkin spice-sugar coating to top off the donuts is optional but really makes them a special sweet treat. 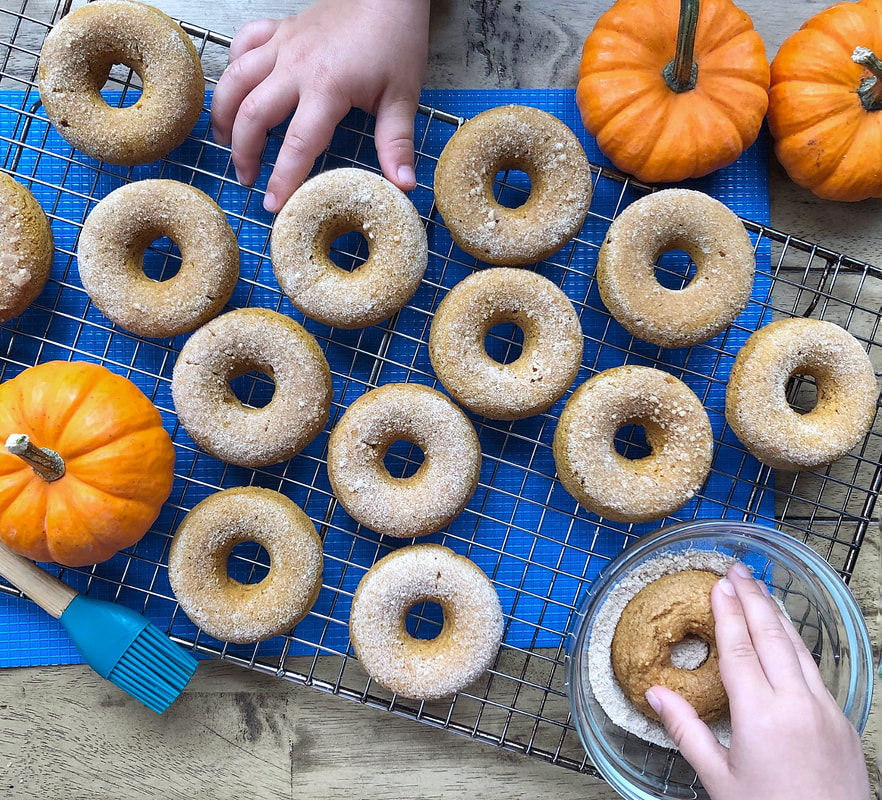 This recipe was developed by Heather Staller, a mom of two boys, ages 5 and 3, and cooking instructor specializing in bringing cooking into preschool classrooms. After college, Heather knew she wanted to be a teacher, but first followed her lifelong dream of going to culinary school. Teaching cooking combines both of her passions, and she truly enjoys introducing young children to the joys of cooking with fresh ingredients. Find Heather on Instagram (@heather.happykidskitchen), where she shares inventive kid-friendly recipes and ideas for cooking with kids at home. Baked Pumpkin DonutsMakes 6 large donuts, 12 mini donuts, or 12-14 mini muffins Ingredients
Want some great products that teach kids to learn to love veggies?
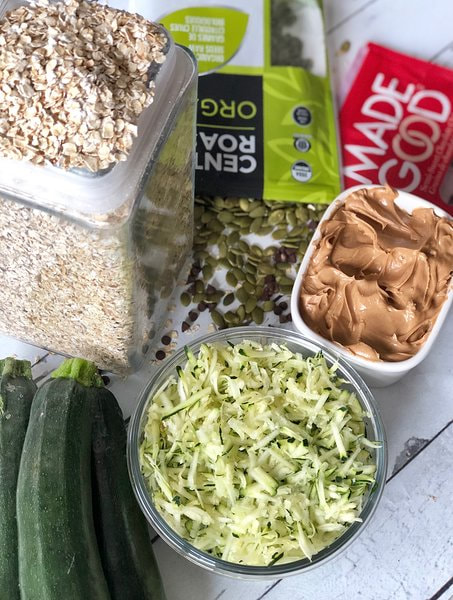
Check out our shop for kid-safe knives, interactive placements, and veggie-themed activity boxes! Zucchini is one of those vegetables that has limitless possibilities. It works as a meal side when sautéed, a pasta alternative when spiralized, a nutrient density booster in "zoats", and a variety of baked goods. One of our family's favorite recipes that includes zucchinis is for Peanut Butter Oatmeal Coconut Cookies. These cookies are packed with nutrition from zucchini, pumpkin seeds, oats, and more! They are free of milk, eggs, refined sugar, and flour which means they are safe for Dairy-Free and Gluten-Free diets. And for anyone with a peanut or legume allergy, the peanut butter can be replaced with Almond Butter, WowButter, or SunButter. We hope you enjoy the recipe, and be sure to check out a few "Kids in the Kitchen" tips at the bottom for times when your children help you make them! 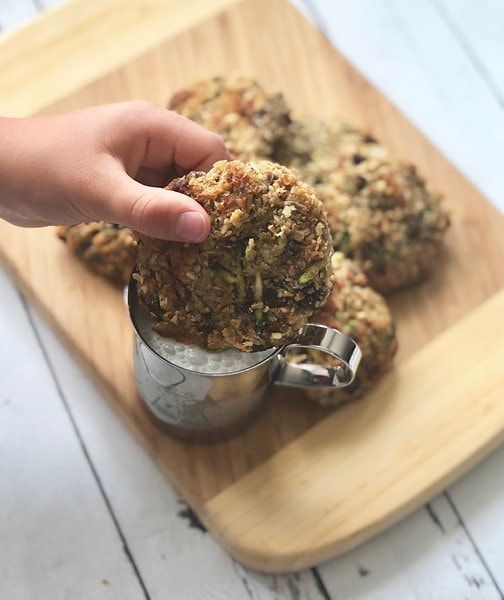 Noelle Martin is a Registered Dietitian and mom of three young boys. She has a passion for education, inspiring, and empowering moms to make healthy choices for themselves and their families. Noelle loves involving her children in food planning and preparation for their home and sees the kitchen as a perfect area for teaching both academic and life skills. Follow @MotherhoodandMeals on Instagram for Noelle's nutrition tips, recipes, product reviews, and motherhood moments. Zucchini CookiesIngredients
*Storing Guidelines: Cookies will remain fresh longer if stored in the fridge or freezer. Kids in the Kitchen Learning NotesI always love to include a learning component for my children when we make a recipe. While making this recipe my son and I talked about the letter Z, the color green (and also yellow since some zucchinis are yellow), the texture difference between whole and shredded zucchini, and we practiced numbers by counting the ingredients as we added them in. Want your kids to eat more veggies?We are excited to bring you this month's post from Katie Blauser, the creator of Eat Pretty Darling. Each month on our blog we feature a "Color of the Week" that corresponds with Veggie Buds Club's veggie of the month. July's veggie is ZUCCHINI so we're focusing on YELLOW veggies this month! 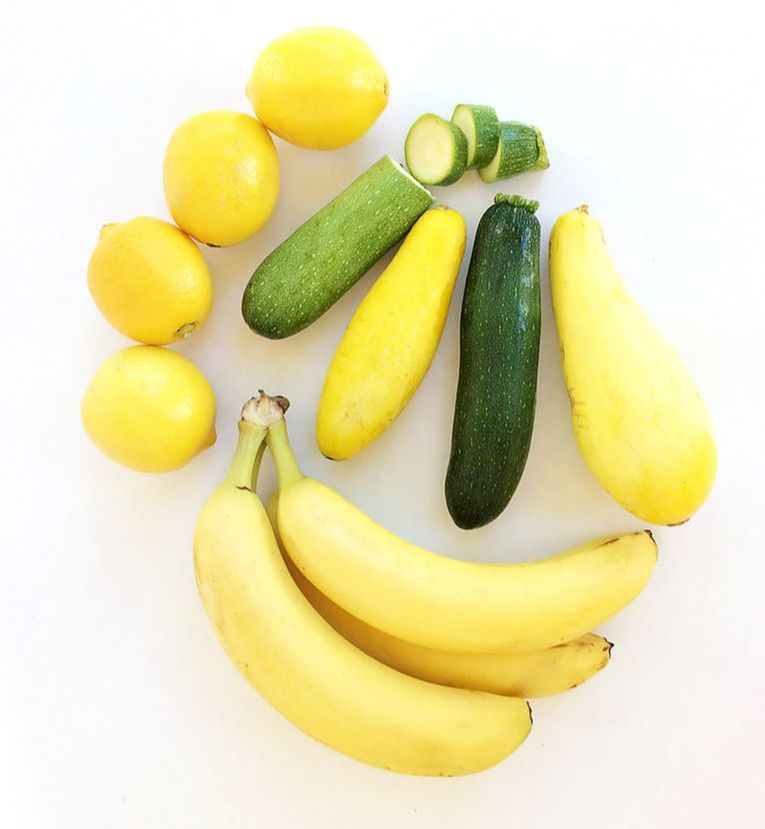 Katie Blauser is the mama of two boys, wife of a picky eater, and food lover at Eat Pretty Darling. She believes in making food fun, healthy, & pretty! Katie’s not only outnumbered by boys in her little family, but also by picky eaters. She loves trying to find new ways to get both kids and adults to eat healthy while making food pretty yummy, pretty healthy, and pretty fun! Find Katie on Instagram (@eatprettydarling), where she shares colorful and cute food ideas for both picky and adventurous eaters. Color of the Week - YELLOWSo you might be thinking, why is the color of the week yellow when zucchini are most definitely green? Zucchini are yellow inside! Sometimes the insides of fruits and veggies are the prettiest part. Think of all the fun produce that can fit more than one category! We think of kiwi as green although they are brown on the outside. This week we rounded up yellow squash, lemons, bananas, and of course zucchini. Zucchini is one of those awesome veggies that can be turned into just about anything! One of our favorite ways to eat it is in our baked goods. We all know that yummy zucchini bread, but add in a few other ingredients and you have a new twist on an old favorite! 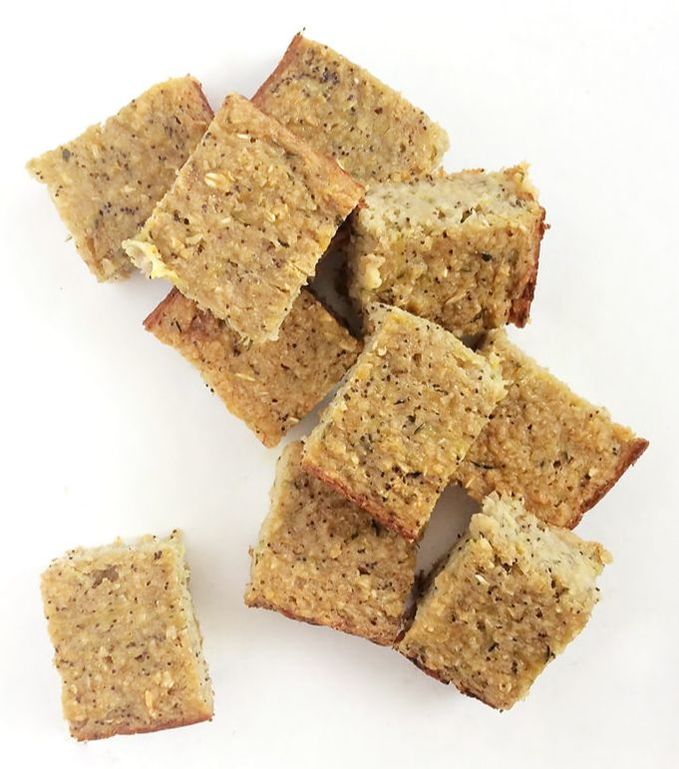 Lemon Poppy Seed Squash SquaresIngredients
Want some great products that teach kids to learn to love veggies? Check out our shop for kid-safe knives, interactive placements, and veggie-themed activity boxes! Yellow Food IdeasThere are more out there, but here’s a list to get started!
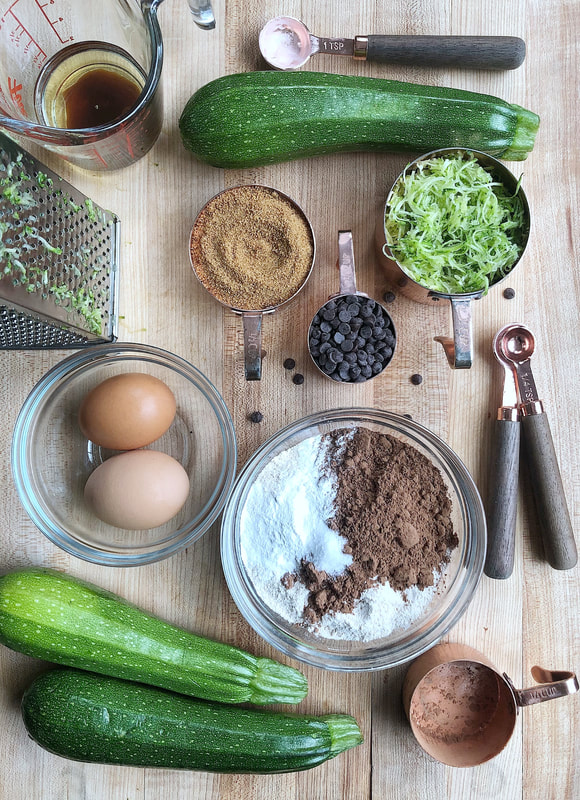
Chocolate and zucchini?? Yes, please! You know kiddos are going to love making this one! Have them help grate the zucchini, measure, stir, and top each brownie bite with a couple chocolate chips. 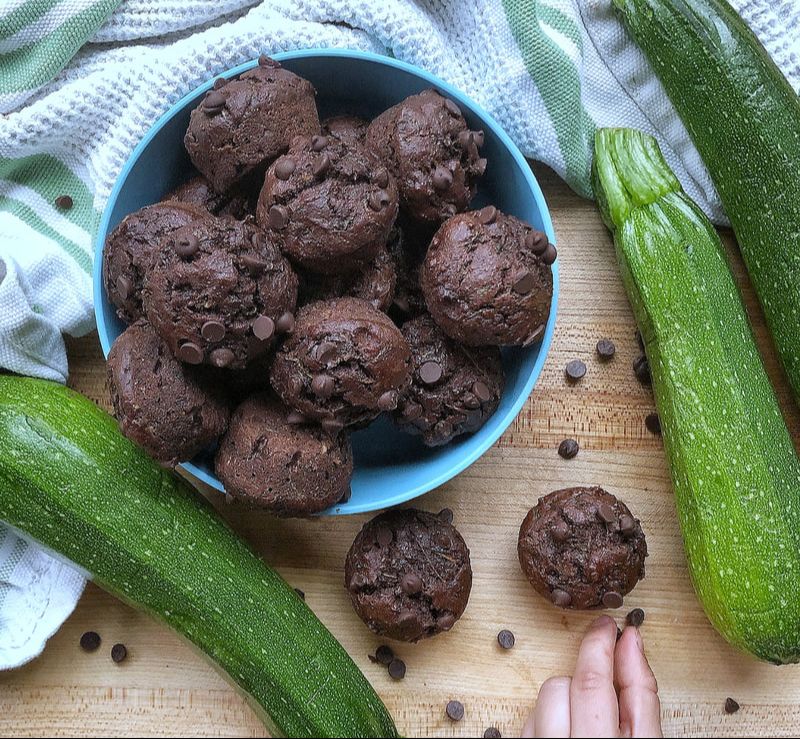 This recipe was developed by Heather Staller, a mom of two boys, ages 5 and 3, and cooking instructor specializing in bringing cooking into preschool classrooms. After college, Heather knew she wanted to be a teacher, but first followed her lifelong dream of going to culinary school. Teaching cooking combines both of her passions, and she truly enjoys introducing young children to the joys of cooking with fresh ingredients. Find Heather on Instagram (@heather.happykidskitchen), where she shares inventive kid-friendly recipes and ideas for cooking with kids at home. Zucchini Brownie BitesMakes 24 Brownies Ingredients
**Substitute flax eggs for egg-free version. (2 tablespoons flax meal mixed with 5 tablespoons water) ***Any vegetable, avocado, or melted coconut oil will work well. Want your kids to eat more veggies?
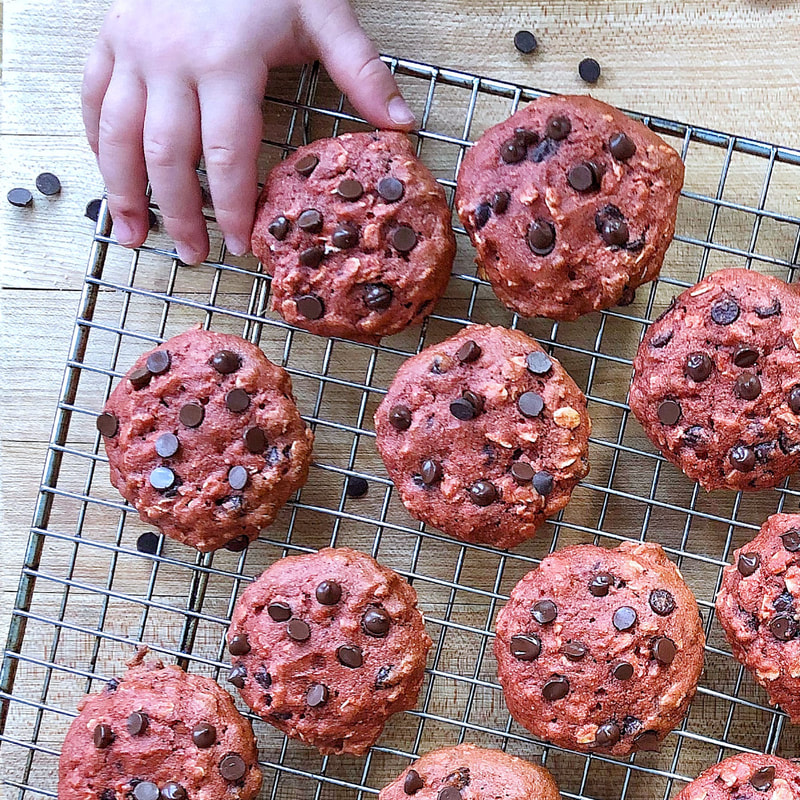
Kids love to bake so this is a great recipe to get your little one interested in trying beets. Not a beet lover yet? You really can't even taste the beets in these tasty cookies!
This recipe was developed by Happy Kids Kitchen for Veggie Buds Club. "Learn to Love Veggies" Tip
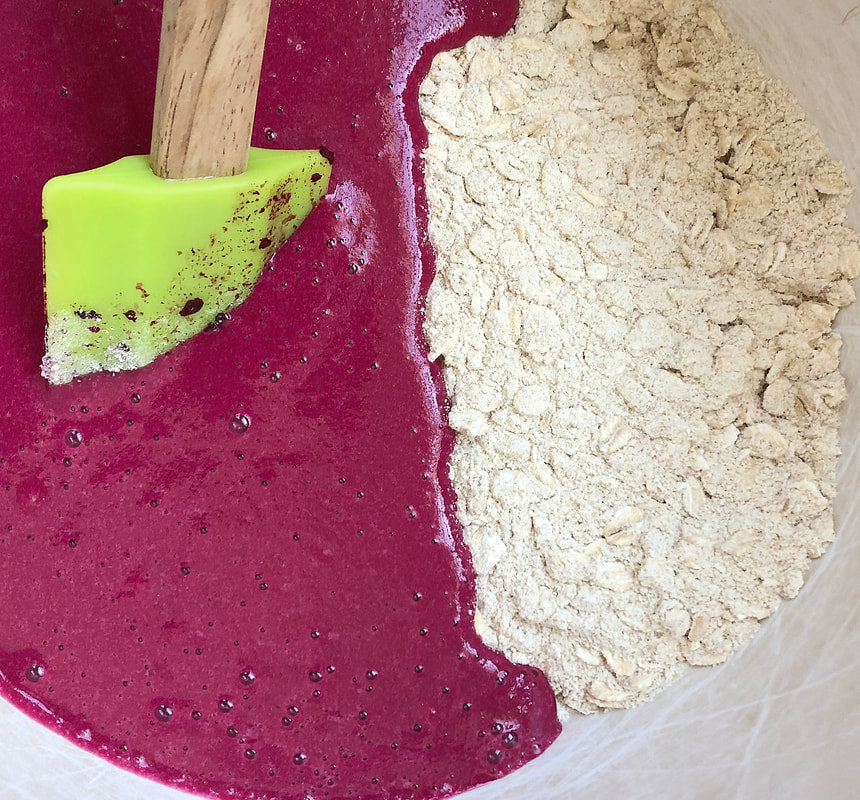
This cookie dough has the brightest magenta color. Unfortunately, the color does fade when baked so make sure to add the beet to the blender together with your children to celebrate the beautiful color it creates. We "eat with our eyes" and these pink cookies are sure to be appealing to young children!
 Beet Oatmeal Chocolate Chip Cookies
Yield: approx. 20 cookies
Prep time: 10 MinCook time: 20 MinTotal time: 30 Min
Kids love to bake so this is a great recipe to get your little one interested in trying beets. Not a beet lover yet? You really can't even taste the beets in these tasty cookies!
Ingredients
Instructions
Notes:*applesauce is less sweet than ripe banana so you may want to add another tablespoon or 2 of maple syrup
Check out our shop for products that teach kids to learn to love veggies! This includes veggie activity boxes, kid-safe knives, interactive placemats, and more.
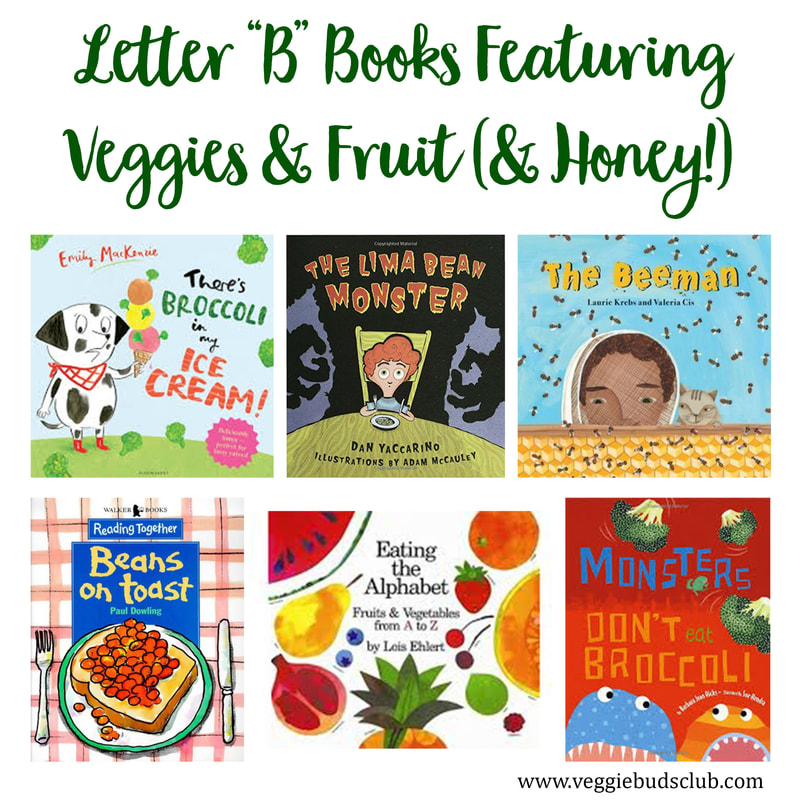
We hope your enjoy these 9 fun and interactive activities and recipes that teach your preschool-aged kids about the letter "B" (and that veggies are fun and tasty!).  1. Read Books!Enjoy our recommended "B" books featuring veggies and fruit (and honey!):
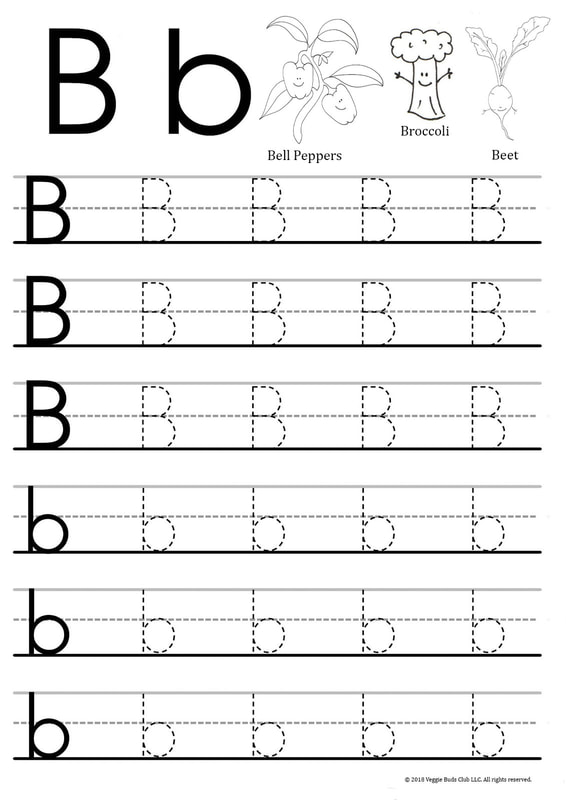
 2. Paint with BroccoliSimply dip broccoli florets in washable paint and use them as "paintbrushes" and/or slice broccoli florets in half to make "tree stamps". So simple and so fun! 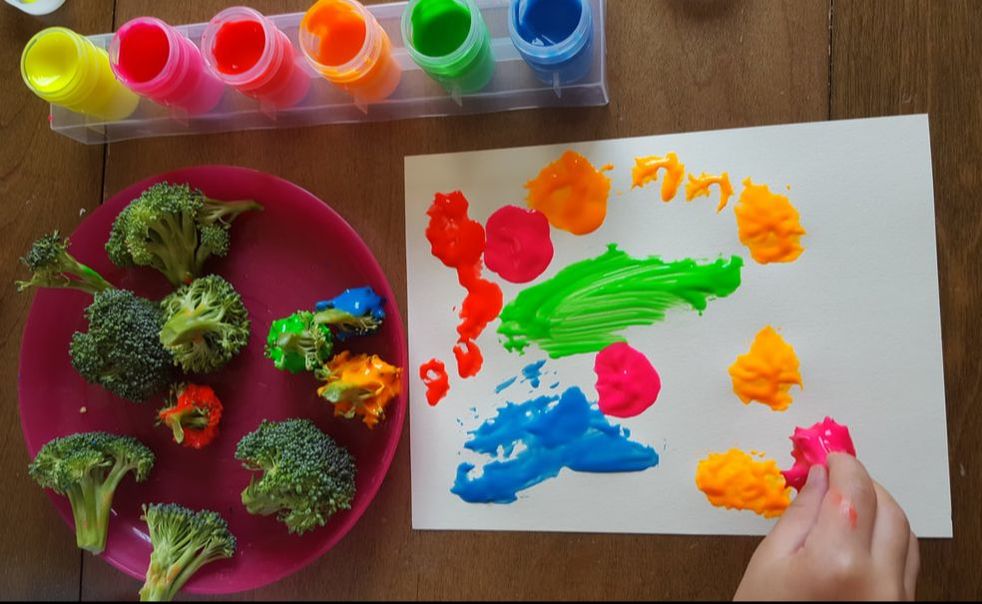 3. Letter "B" TracingDownload this FREE letter "B" tracing sheet from Veggie Buds Club.
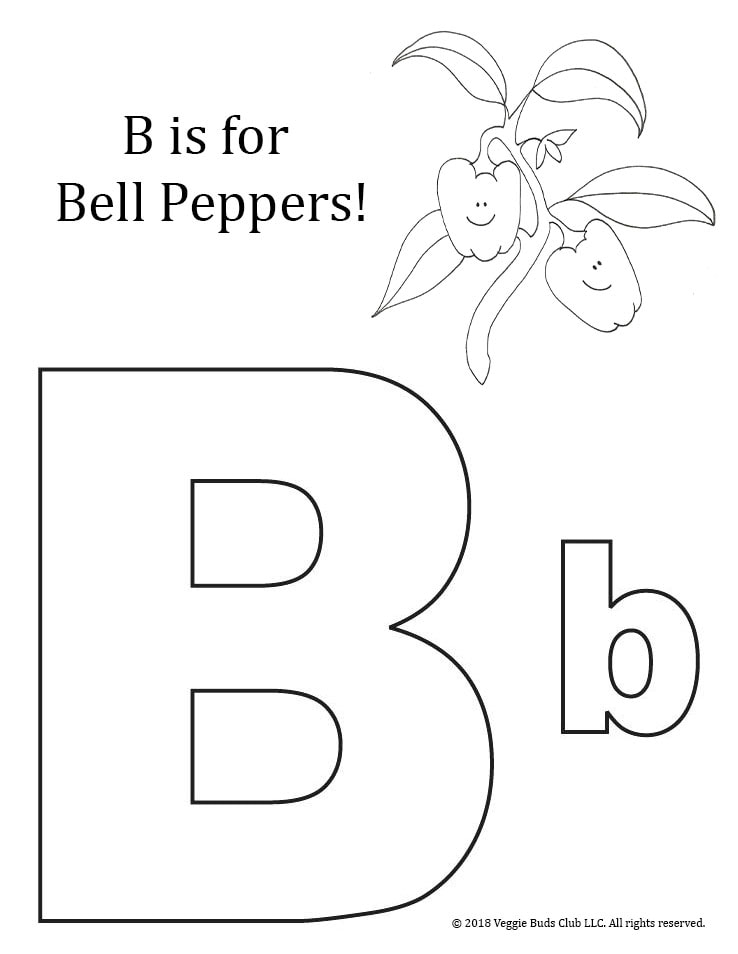
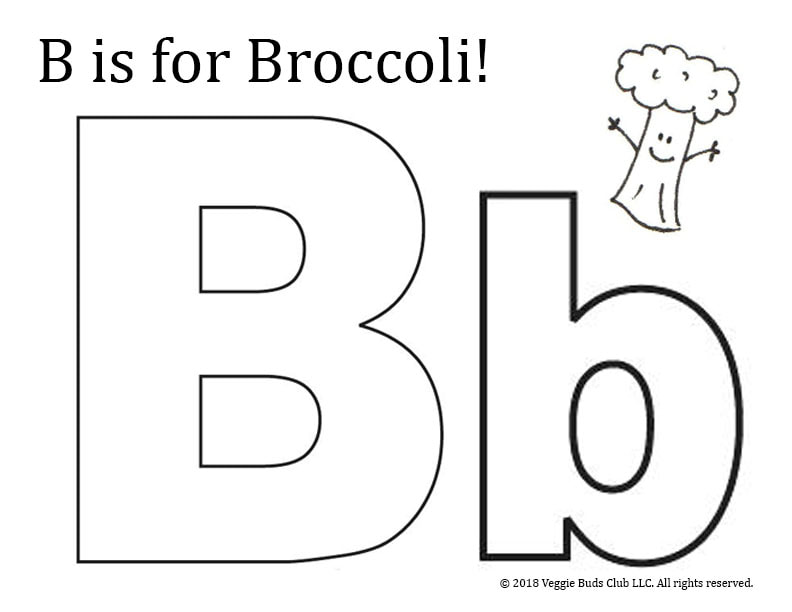
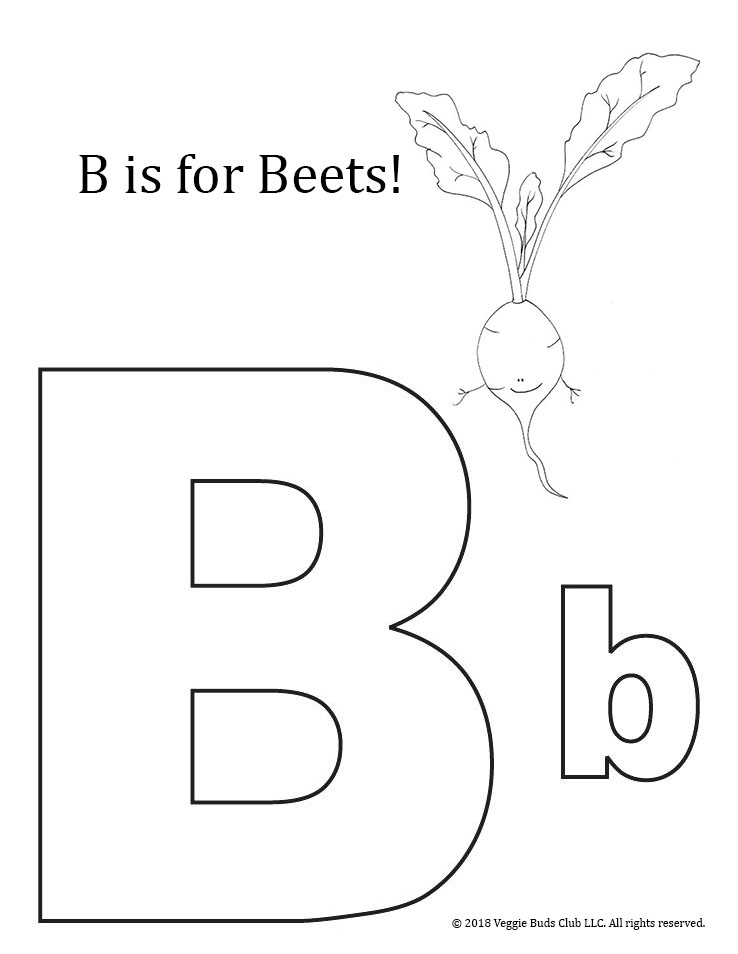
 4. Bake Some Beet Brownies!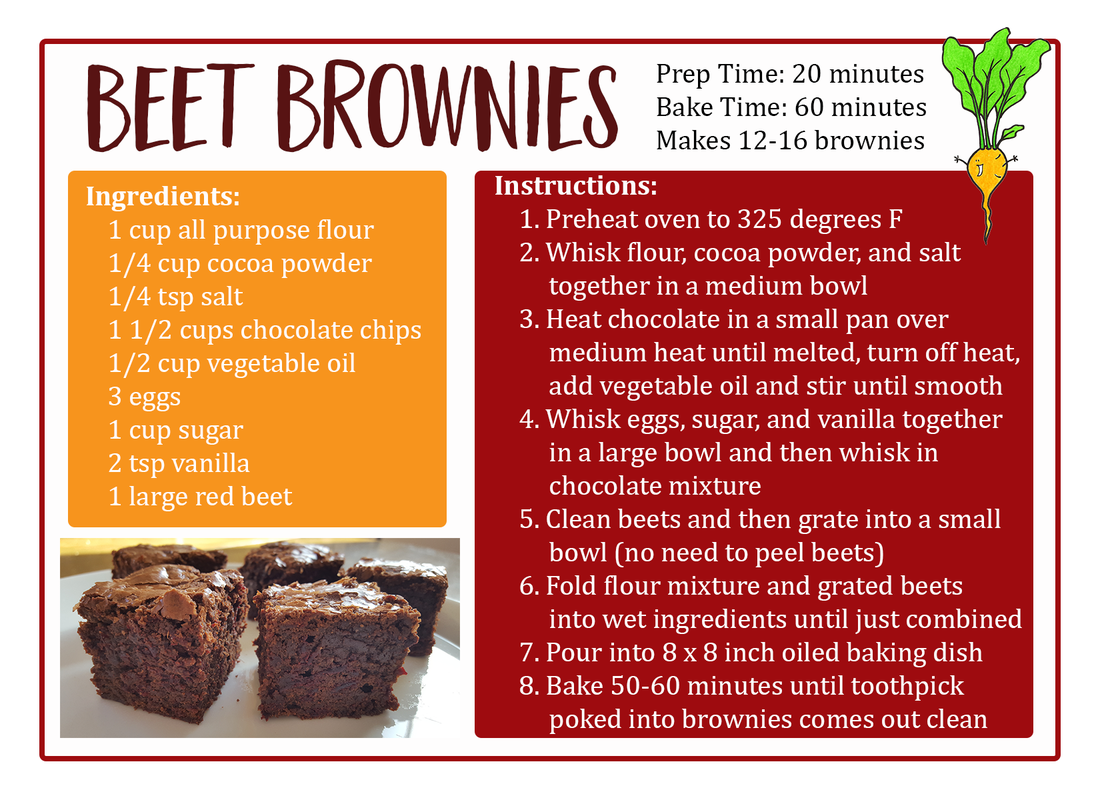 5. Letter "B" Coloring PagesDownload these FREE letter "B" coloring pages from Veggie Buds Club.
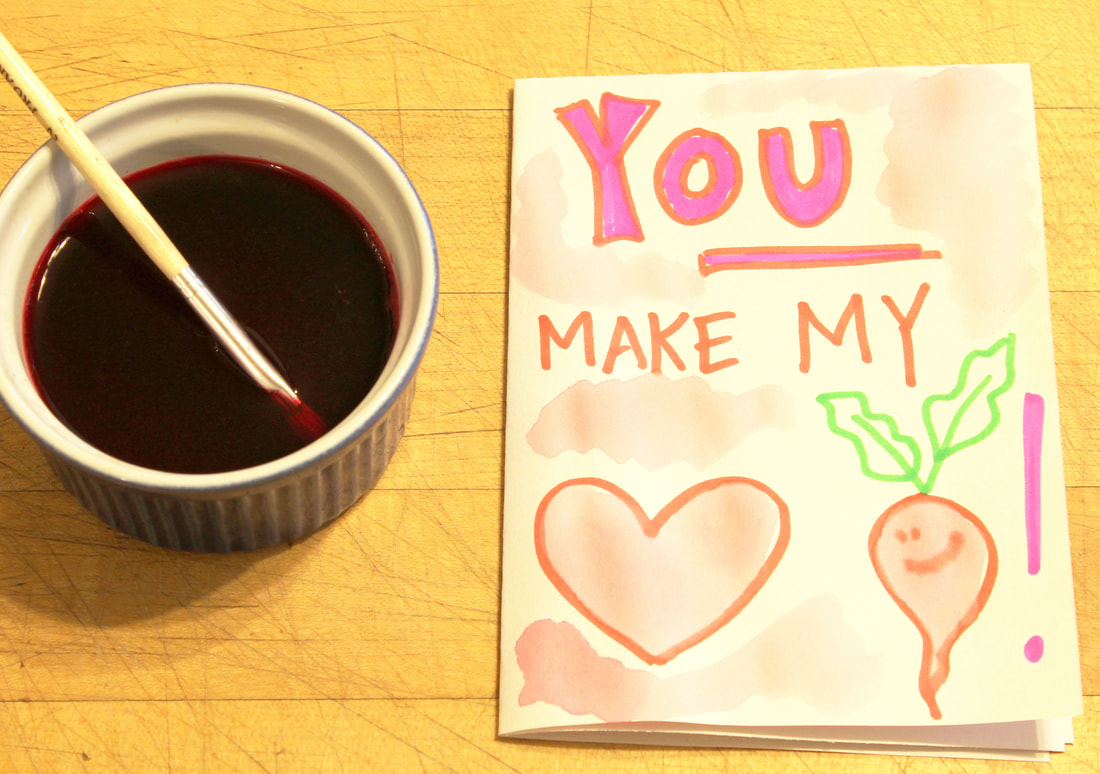
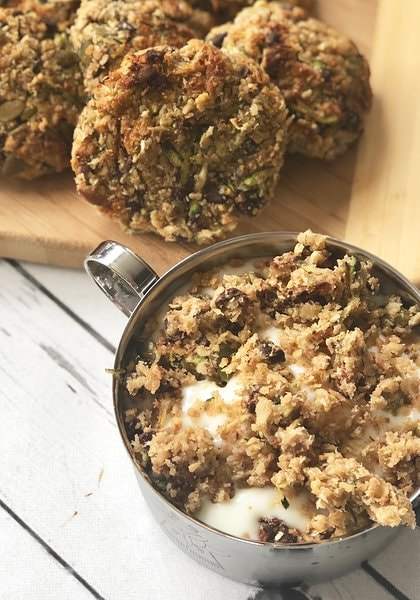
   6. Bake Some Broccoli NuggetsEnjoy this delicious kid-approved recipe from Veggie Buds Club and Happy Kids Kitchen. You can find the recipe here! 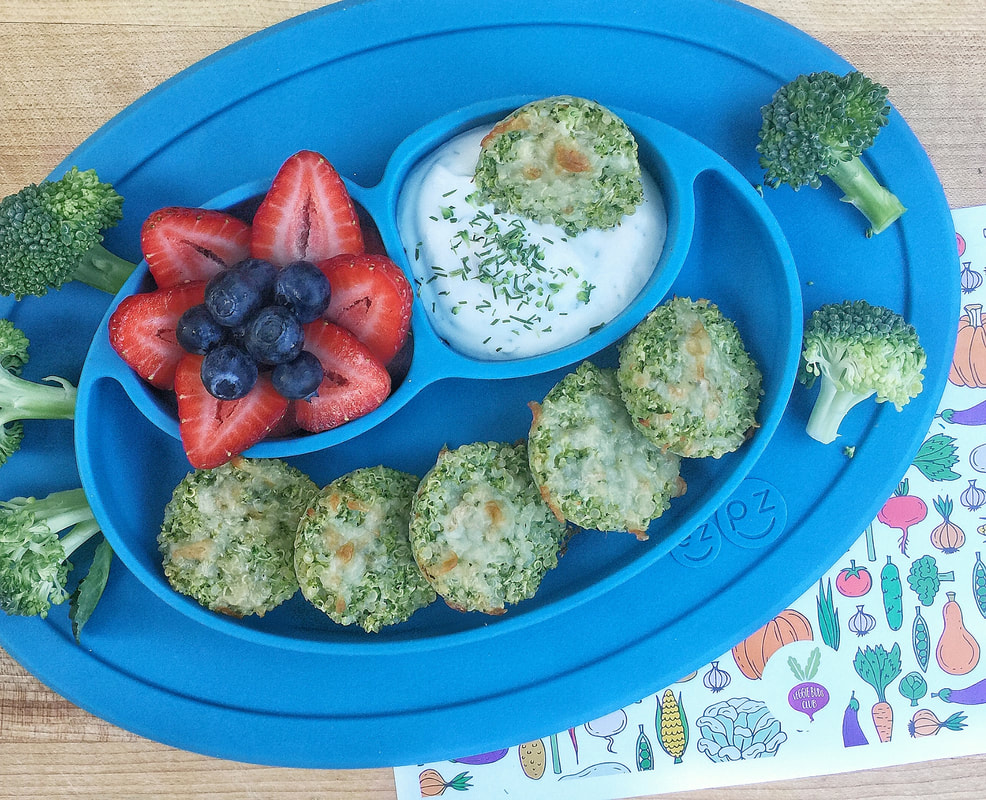 7. Make Beet WatercolorMaterials Needed
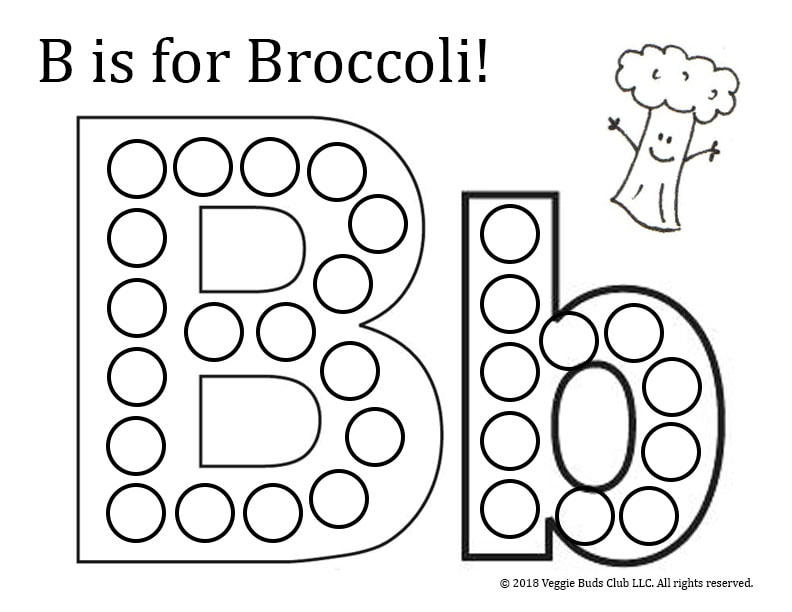
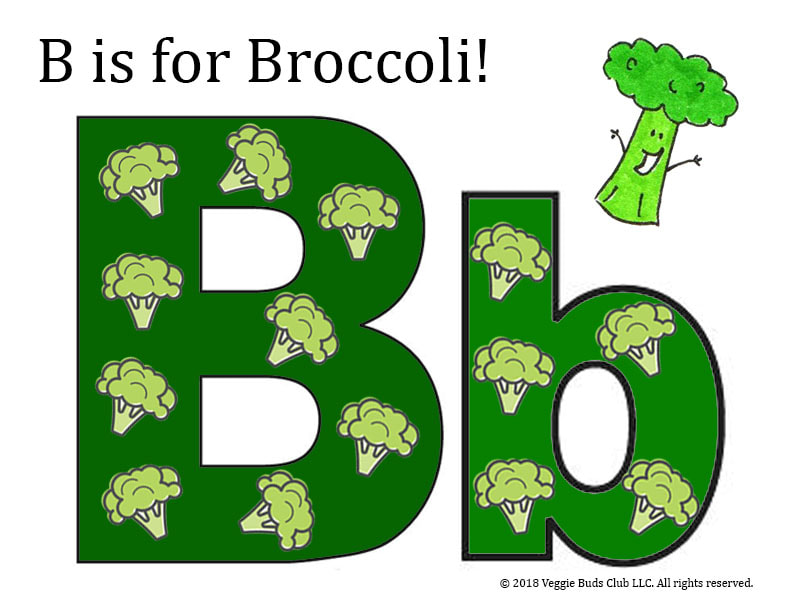
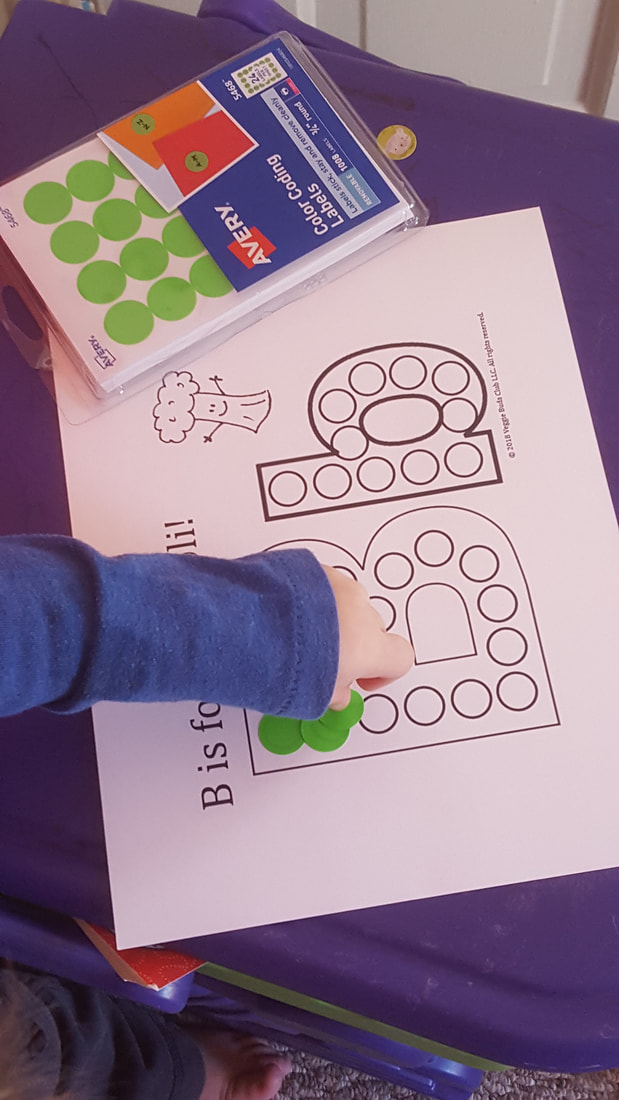
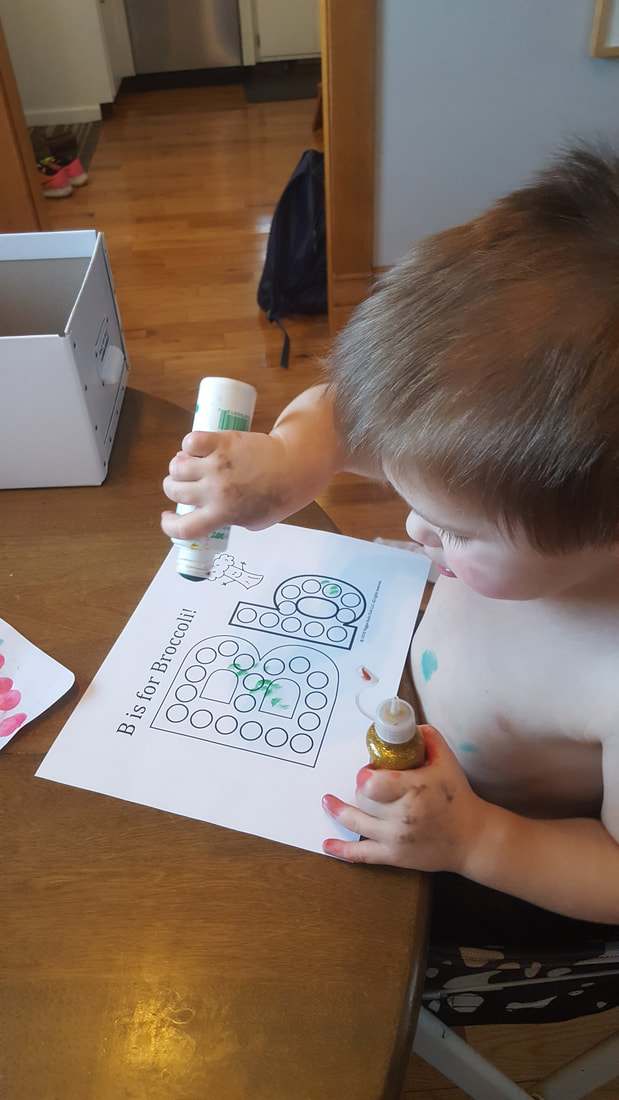
 8. Broccoli Activity SheetsHave fun with these broccoli activity sheets! Create the letter "B" by using dot stickers or dot paint with Activity Sheet #1. Fill in the letter "B" with broccoli florets with Activity Sheet #2 (bonus if you have a laminator!).
9. Play Bean Tic Tac ToeMake a Tic Tac Toe board out of green beans and use two different types of dry beans as the X's and O's! You can also go a step further and create the letter "B" with dry beans and greens beans. Be sure to eat some green beans as a snack while you play! 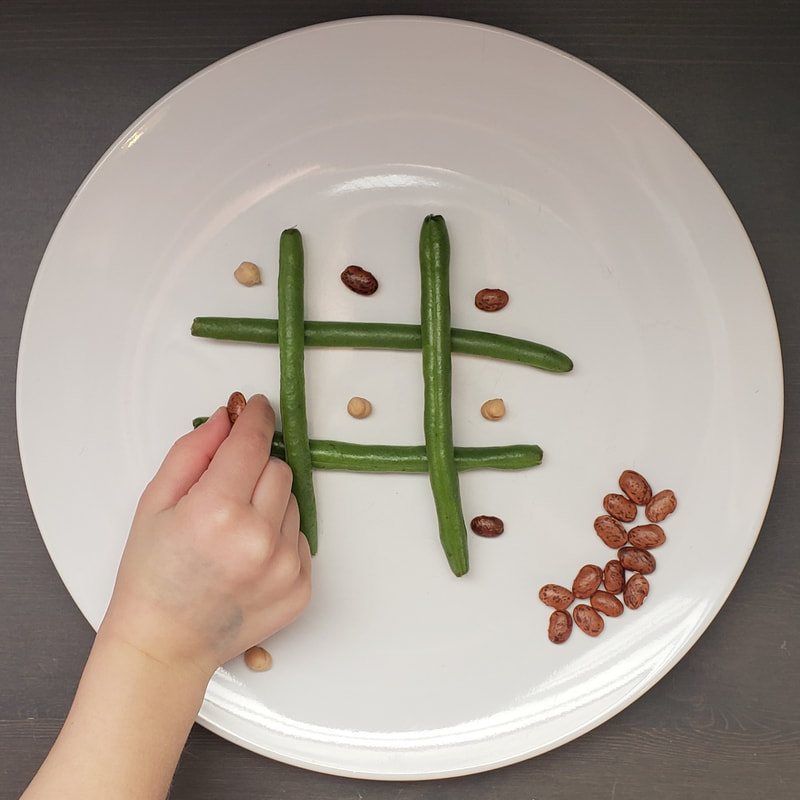 Want your kids to eat more veggies? |
|||||||||||||||


